Server Update
Table of contents
- Overview
- Download the File
- Set File Permissions
- Activate the Update
- Choose Installation Path
- Locate the Previous Installation
- Retain Previous Versions
- Install the Update
- Completion
- Summary
Overview
This tutorial provides a step-by-step guide to installing and updating the software while preserving existing configurations and settings.
Download the File
Download the required installation file from the provided link or source.
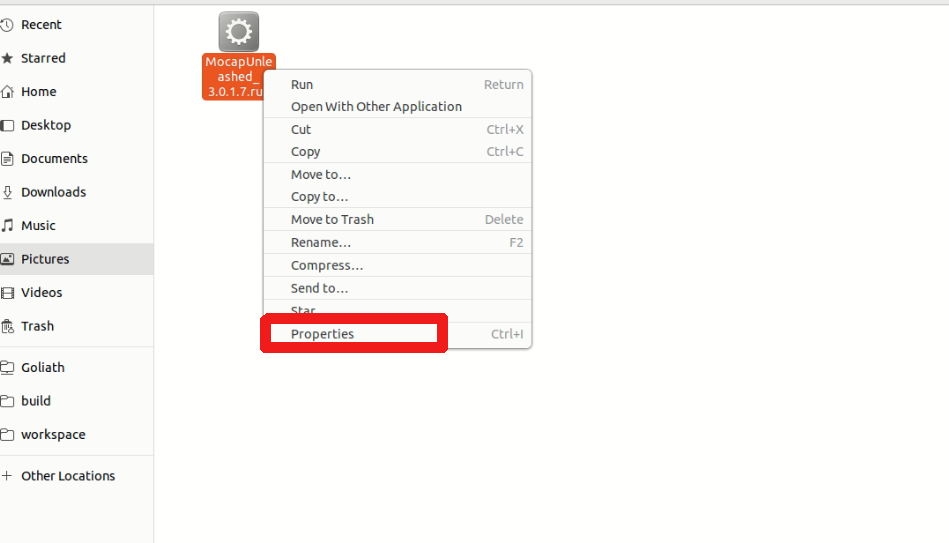
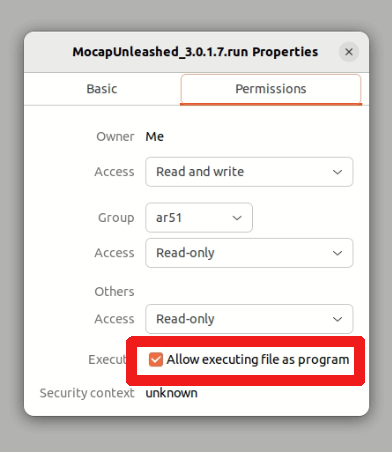
Set File Permissions
Right-click the downloaded file and select Properties.
- Navigate to the Permissions tab.
- Check the box for Allow executing file as program.
Activate the Update
Double-click the file (or right click and “Run”) to start the update process. 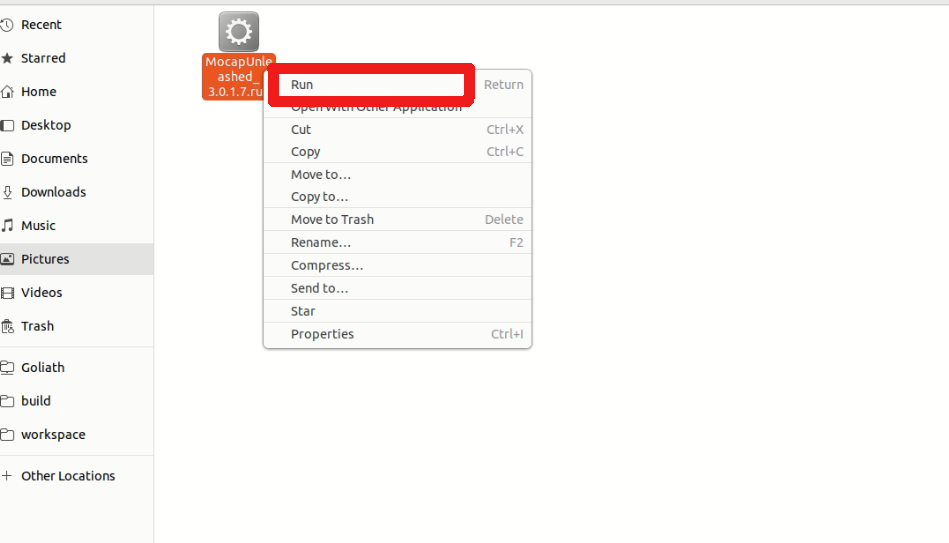
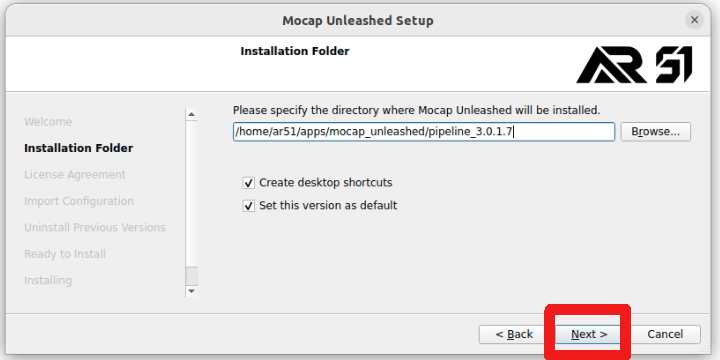
Choose Installation Path
- Select the desired installation path.
- The default path is usually the best option.
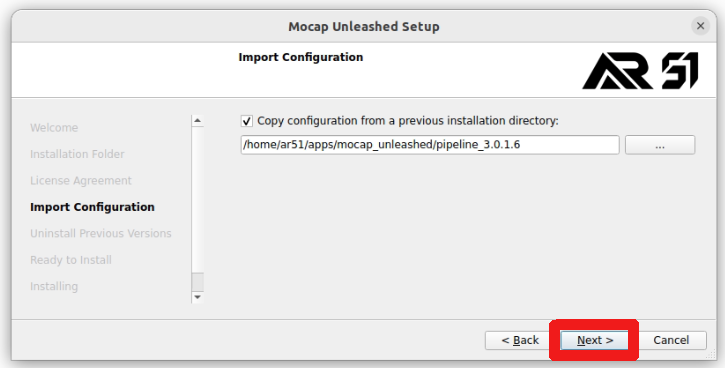
Locate the Previous Installation
- Choose the path of the last installed version.
- This will be used to copy the existing configurations and settings.
- By default, the system will detect and import the settings from latest installed version.
Retain Previous Versions
It is recommended to keep previous versions intact for backup purposes. 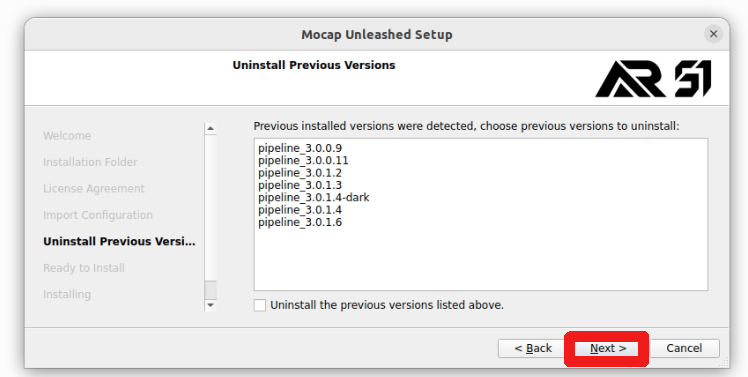
Install the Update
- Click Install to proceed.
- The installer will extract and apply the new update automatically.

Completion
Once the installation is complete, restart the software to apply changes.
Summary
This guide outlines the installation and update process, ensuring that configurations and settings from previous installations are preserved. Following these steps will help you successfully install the latest version of the software while maintaining system integrity.