Replacing an IR filter
Why Replace a Filter?
Filters in machine vision cameras play a crucial role in determining the wavelengths of light captured by the camera. Replacing or removing filters is often necessary in specialized scenarios, such as:
-
Using projectors or operating in a dark room, where visible light interference must be minimized.
-
Enhancing performance with an infrared (IR) light source (e.g., 850nm IR lights) to improve visibility in low-light or no-light environments.
Replacing the filter allows you to:
-
Expand the camera's sensitivity to include both the near-IR and visible spectrum.
-
Focus on capturing near-IR wavelengths by blocking visible light with an IR pass filter.
Step-by-Step Filter Replacement Process
Remove the Lens
Unscrew and safely remove the lens from the camera to expose the filter or sensor housing.
Access the Camera’s Outer Shell
Unscrew and carefully remove the outer casing of the camera. Keep the screws in a secure place to avoid losing them.
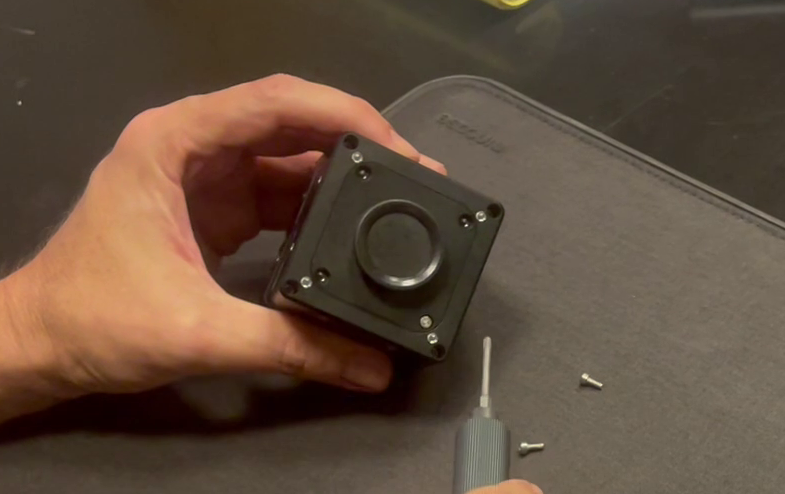
Remove the Existing Filter
Most color cameras come with a pre-installed IR filter that blocks infrared light while allowing visible light through.
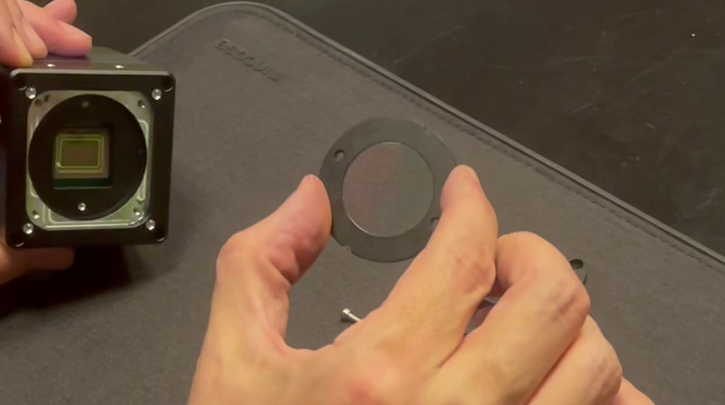
Gently detach this filter if you want the camera to capture both near-IR and visible light
Important: Be careful not to touch the camera sensor with your finger. The oils from your skin can leave a smudge on the sensor or filter, reducing the quality of the images captured by the camera.
Install a New Filter (if required)
To block visible light and capture only near-IR wavelengths, install a near-IR pass filter in place of the existing IR filter. Ensure the filter is securely positioned over the sensor.
Reassemble the Camera
-
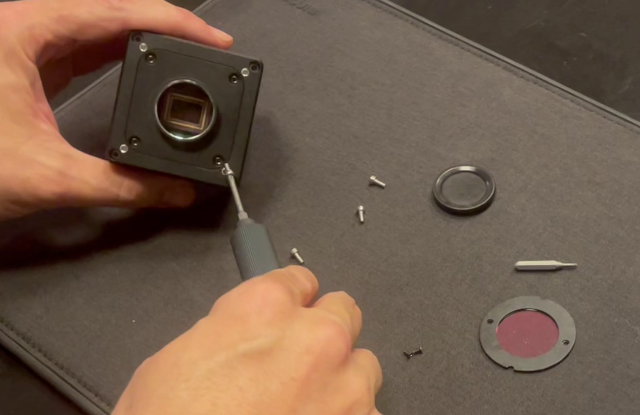
Carefully replace the camera’s outer shell and secure it by tightening the screws.
-
Reattach the lens by screwing it back into place.
Additional Tips
-
Ensure Compatibility: Check that the new filter is compatible with your camera model. Incorrect filters may cause vignetting or performance issues.
-
Use Appropriate Tools: Handle the camera and its components with tools designed for precision electronics to avoid damage.
-
Test the Camera Setup: After replacing the filter, test the camera with your IR light source to confirm proper functionality. Adjust focus and other settings as needed.
Summary
By following this guide, you can successfully modify your machine vision camera to suit specific lighting and operational requirements.