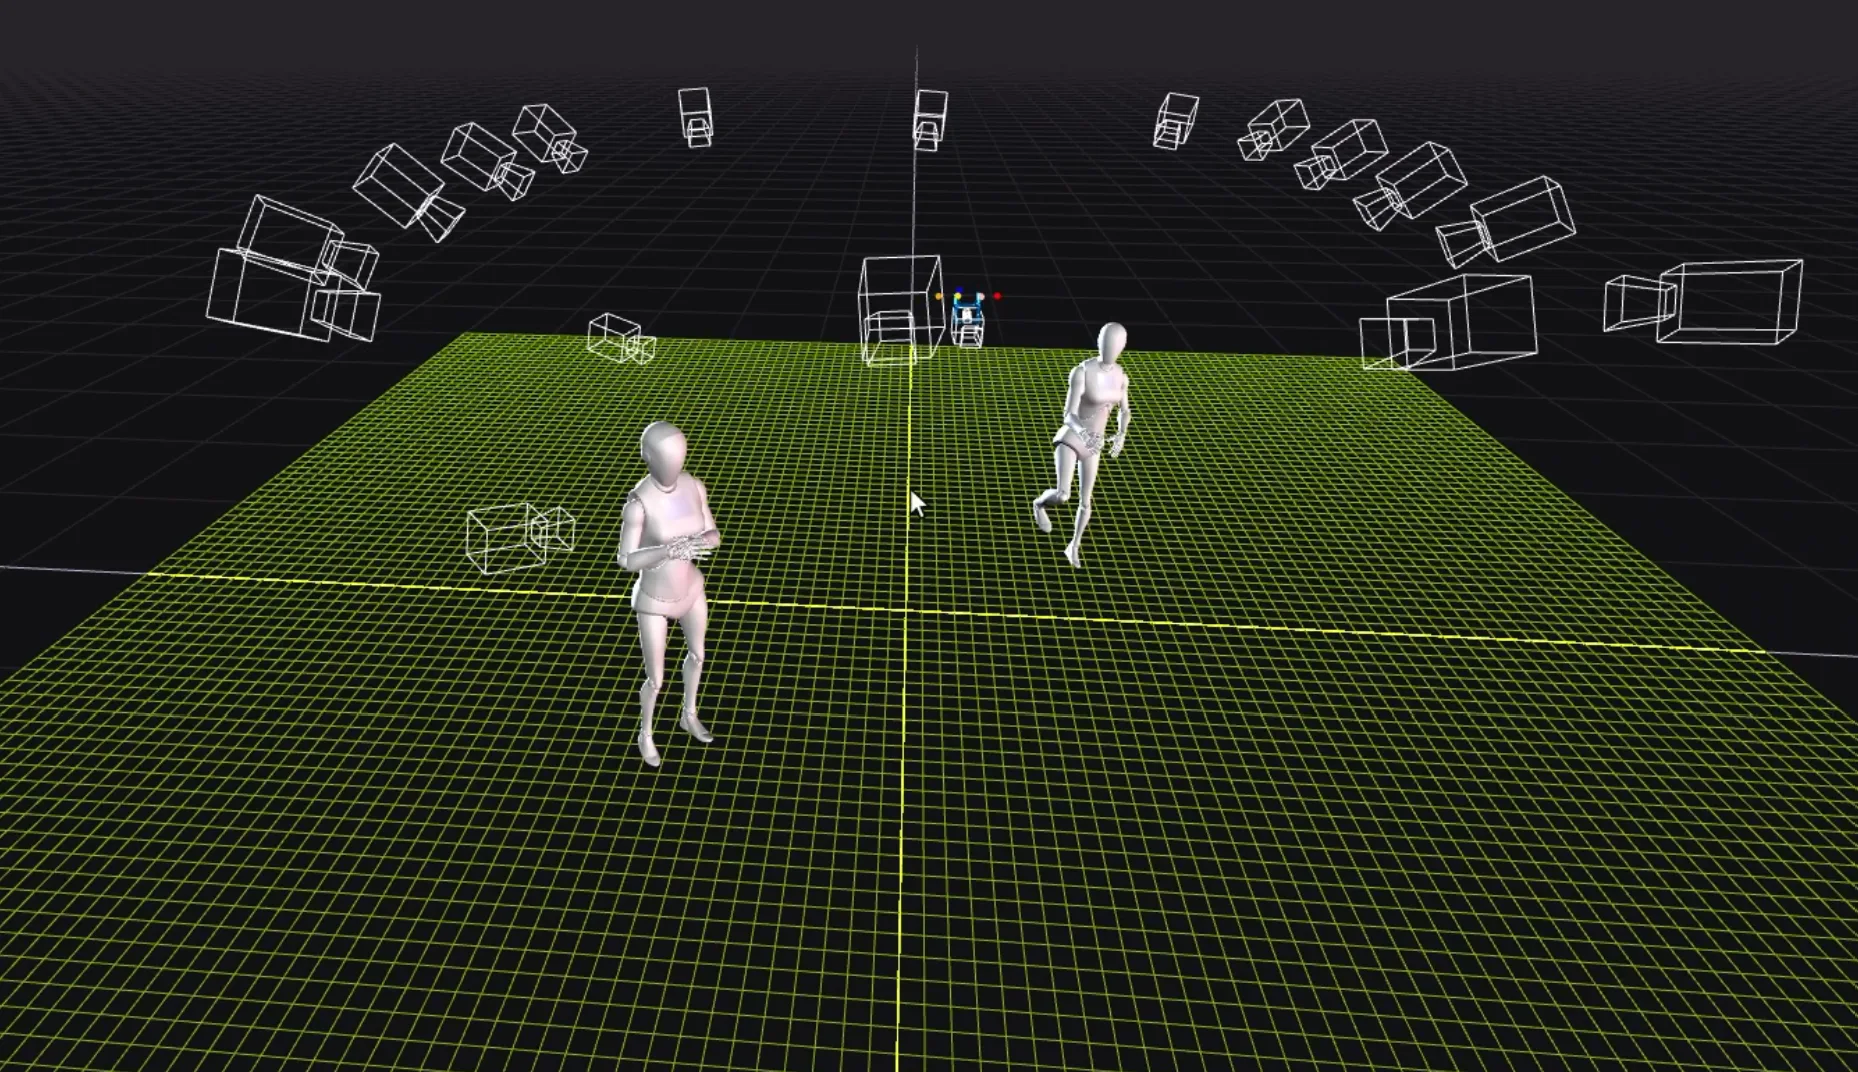
Camera calibration
Before capturing motion data, you must perform camera calibration so that all cameras accurately understand the capture volume and relative positions.
The calibration has two steps:
-
Calibration board detection.
-
Lit calibration sphere detection.
Capture good calibration data
Camera calibration comes down to one skill: slowly walking a brightly-lit calibration sphere around the space so every camera sees it from many angles and heights. Get this right and the rest follows — so before the step-by-step below, here's what good capture looks like and the mistakes to avoid.
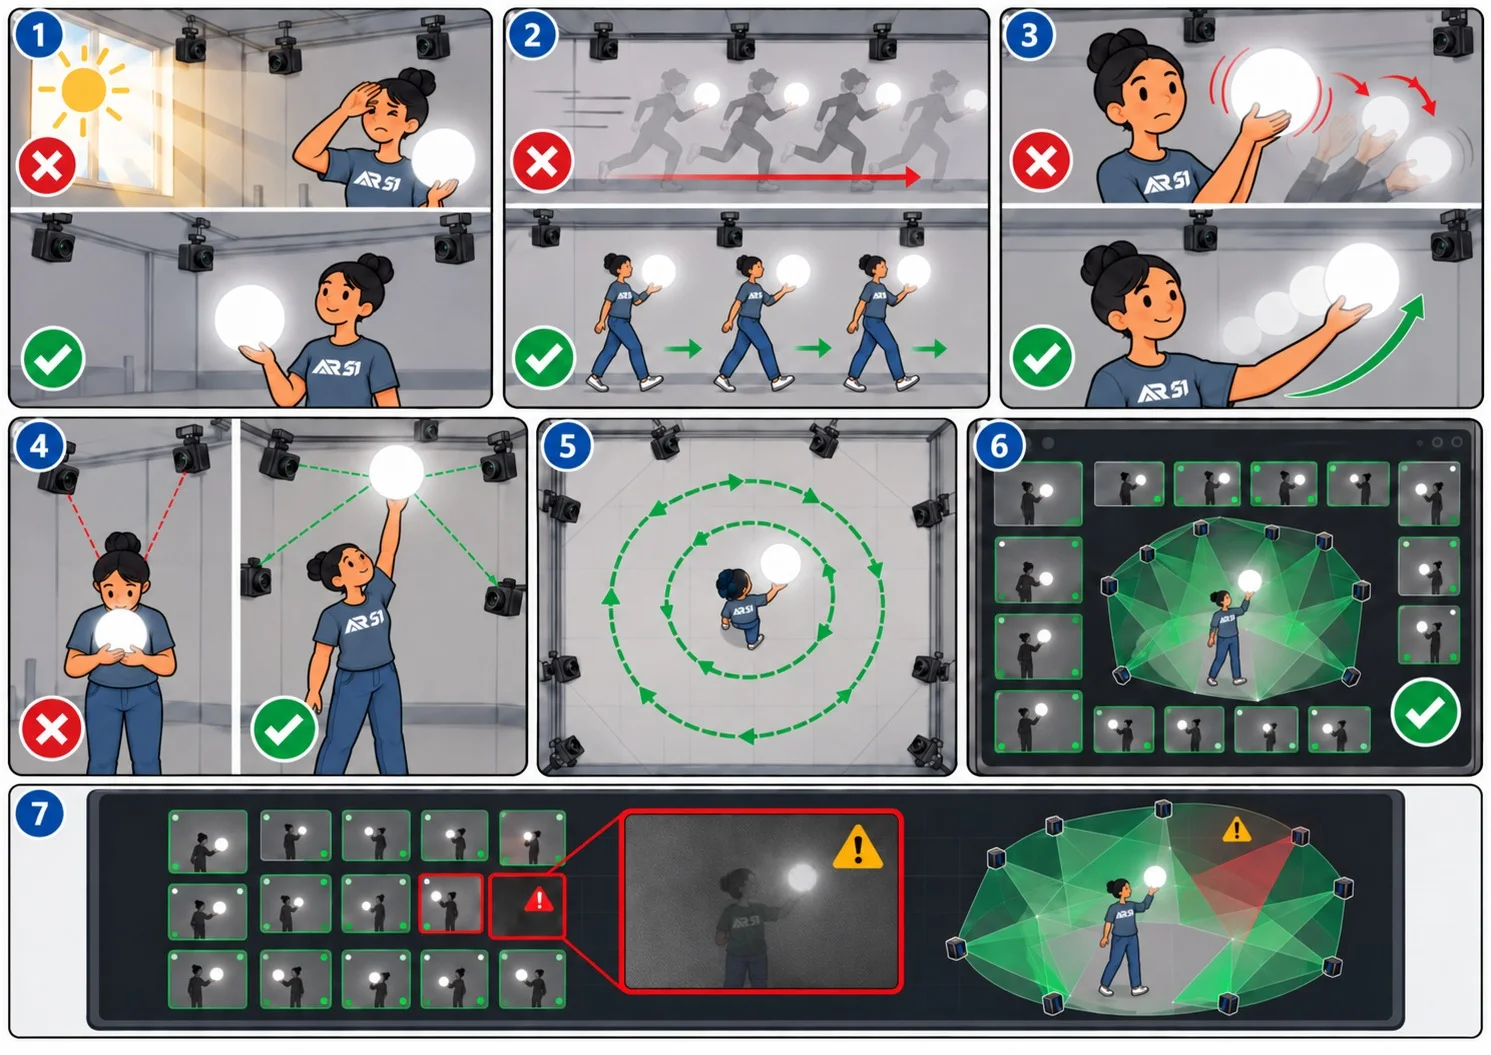
The calibration walk at a glance — good technique (✅) and the common mistakes to avoid (❌).
Do
- Keep the sphere clearly lit and glare-free — avoid direct sunlight or a bright window behind you.
- Walk at a steady, continuous pace.
- Move the sphere in smooth arcs, changing its height and orientation as you go.
- Hold the sphere up and out, where the cameras can see it.
- Cover the whole floor in overlapping circles, working into every corner.
Don't
- Run or move abruptly.
- Shake or flick the sphere quickly.
- Hold the sphere against your body or block it — it gets hidden from the cameras.
- Work under strong glare or warm/yellow light.
Check your coverage. In Mocap Studio the coverage view fills in green as each camera sees the sphere from enough angles — aim for green across every camera. Red areas, or a flagged frame, mark a spot the cameras couldn't see well; walk back through those areas until they turn green.
Open the AR 51 Management System in a Browser
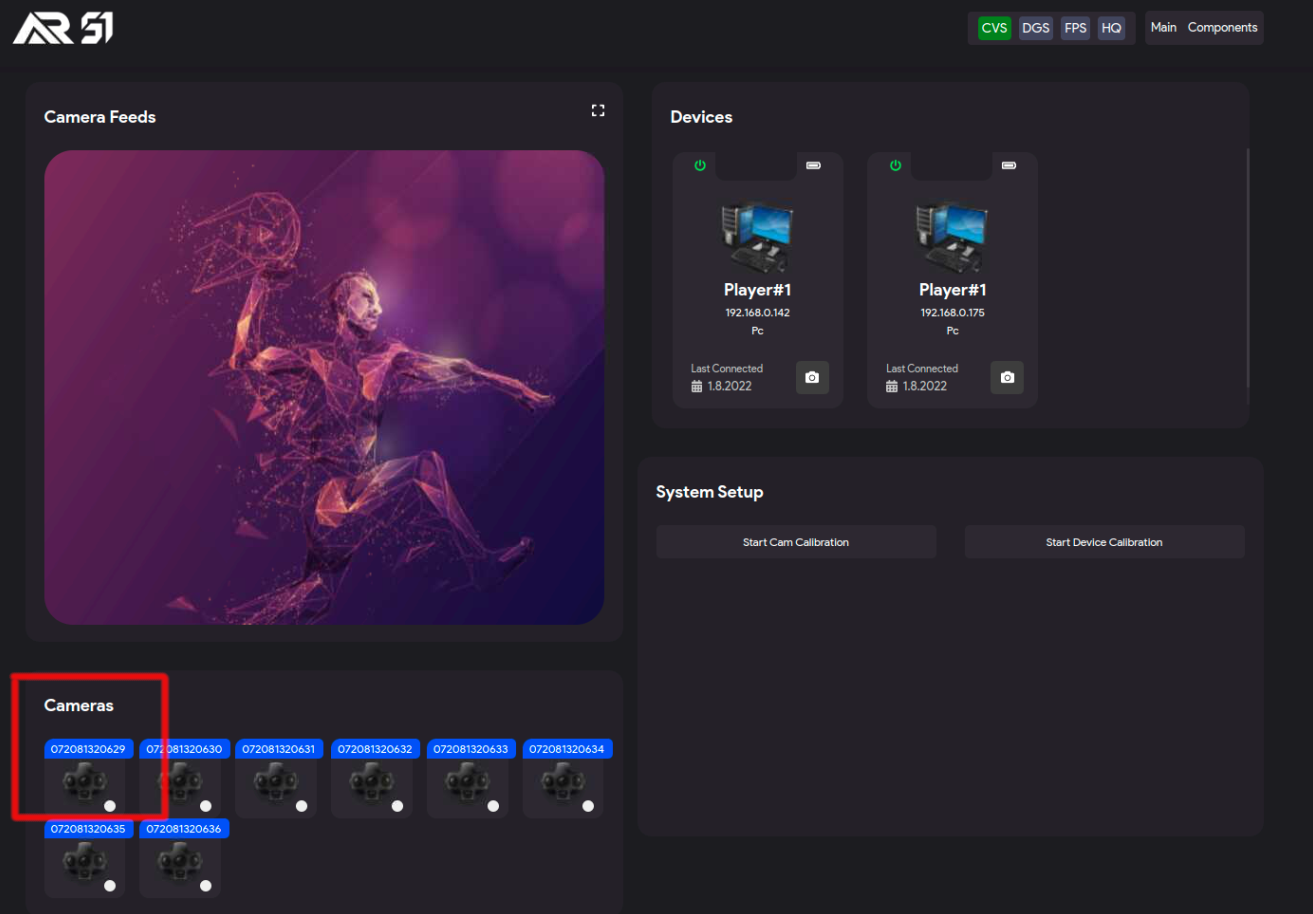
Using the web interface, you can monitor the system and activate the calibration process.
Camera check
Check that all cameras appear and that the feed from each camera works.
Ensure all cameras are pointing to the capture area and there is good coverage.
Poor coverage can lead to poor capture quality.
You can use the feed to check that all cameras are pointing to the capture area. \
And, that there is good coverage of the area.
Place the provided calibration board
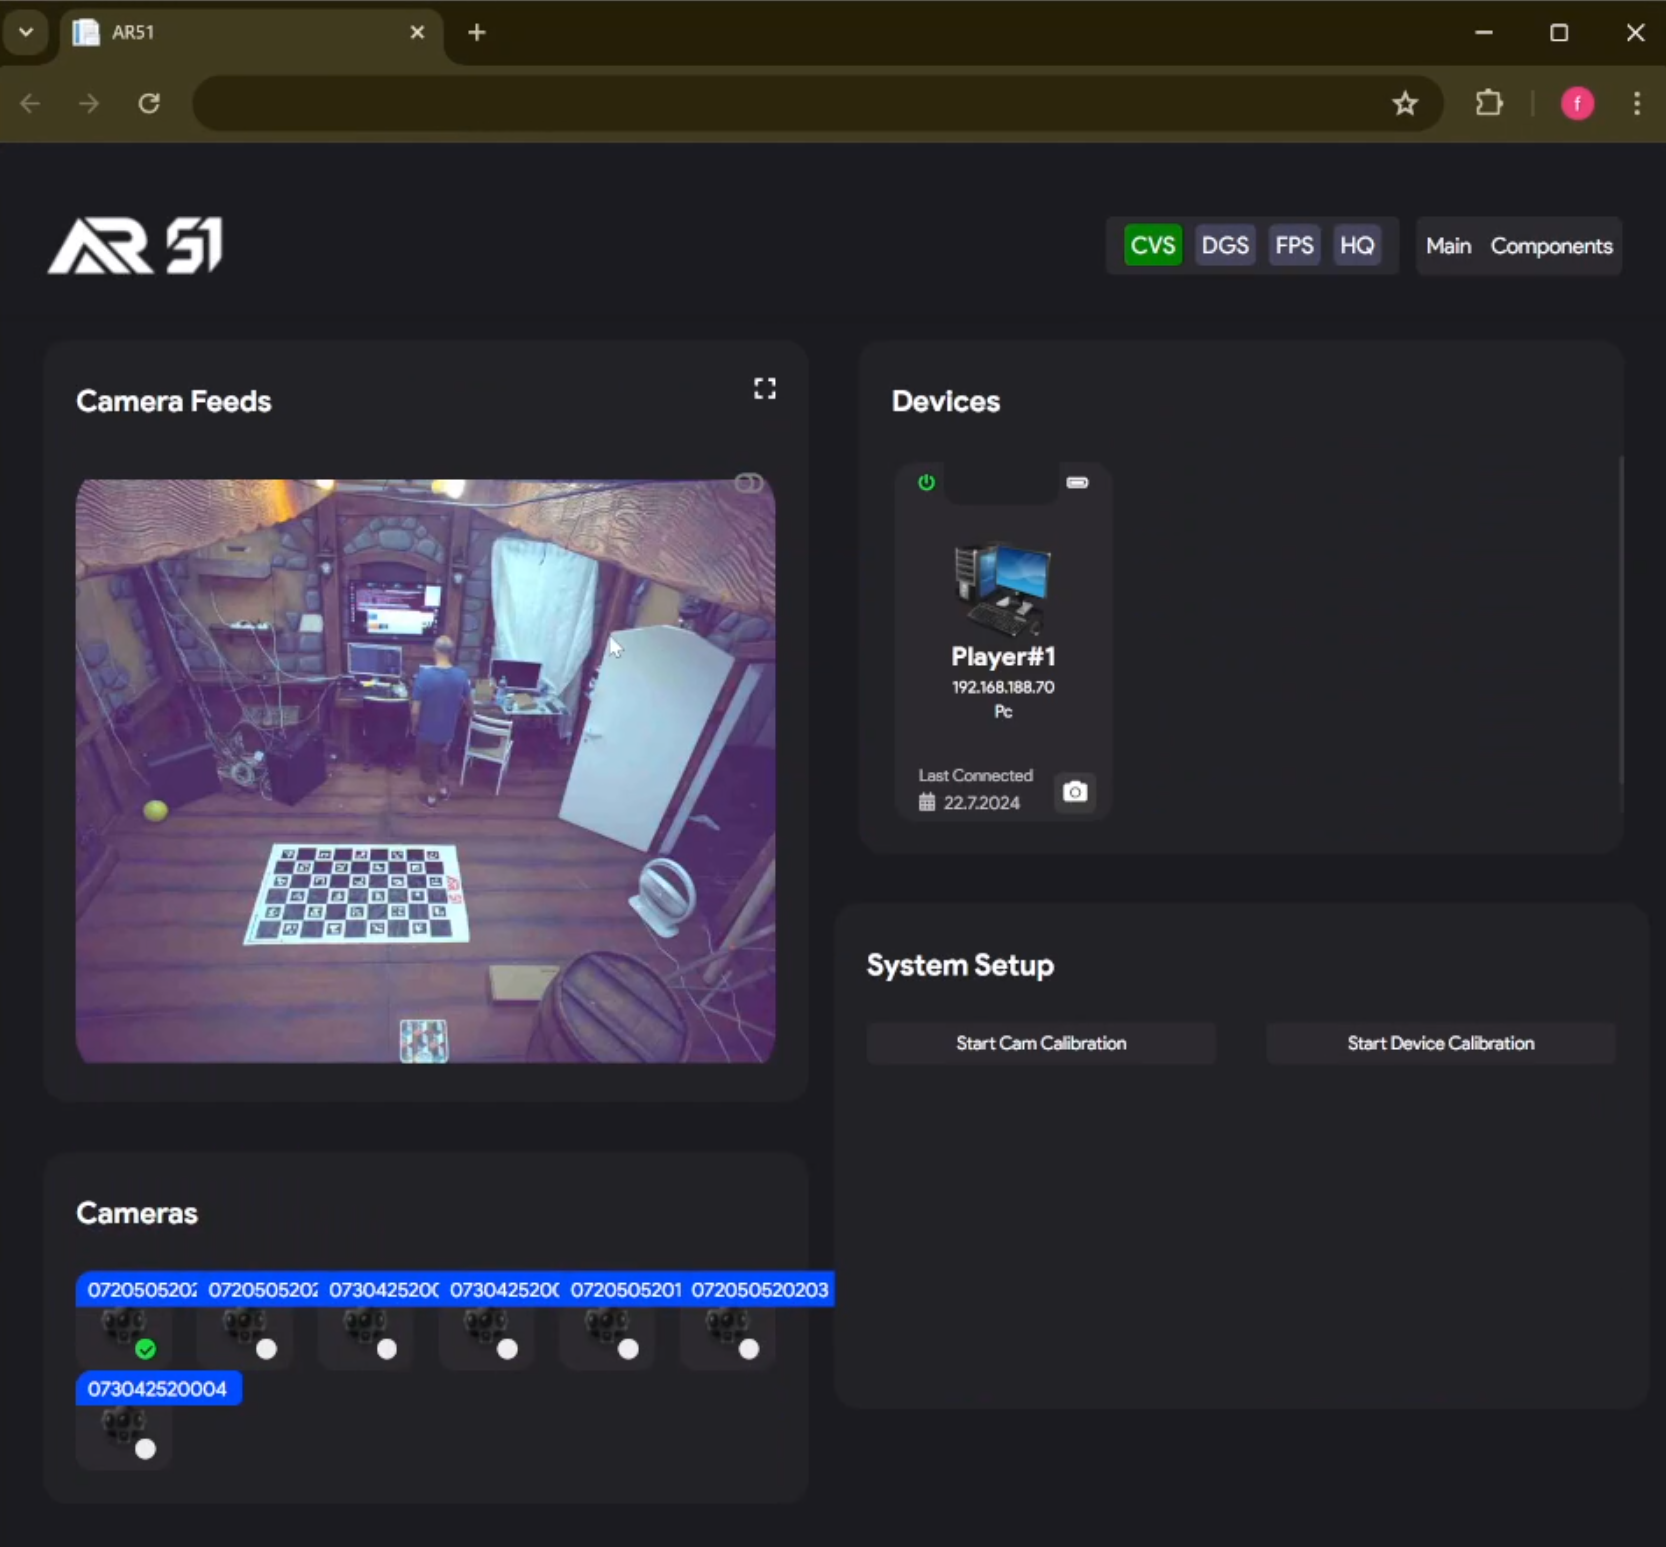
Place the provided calibration board in the middle of the capture area.\
Make sure the calibration board is fully visible to as many cameras as possible.
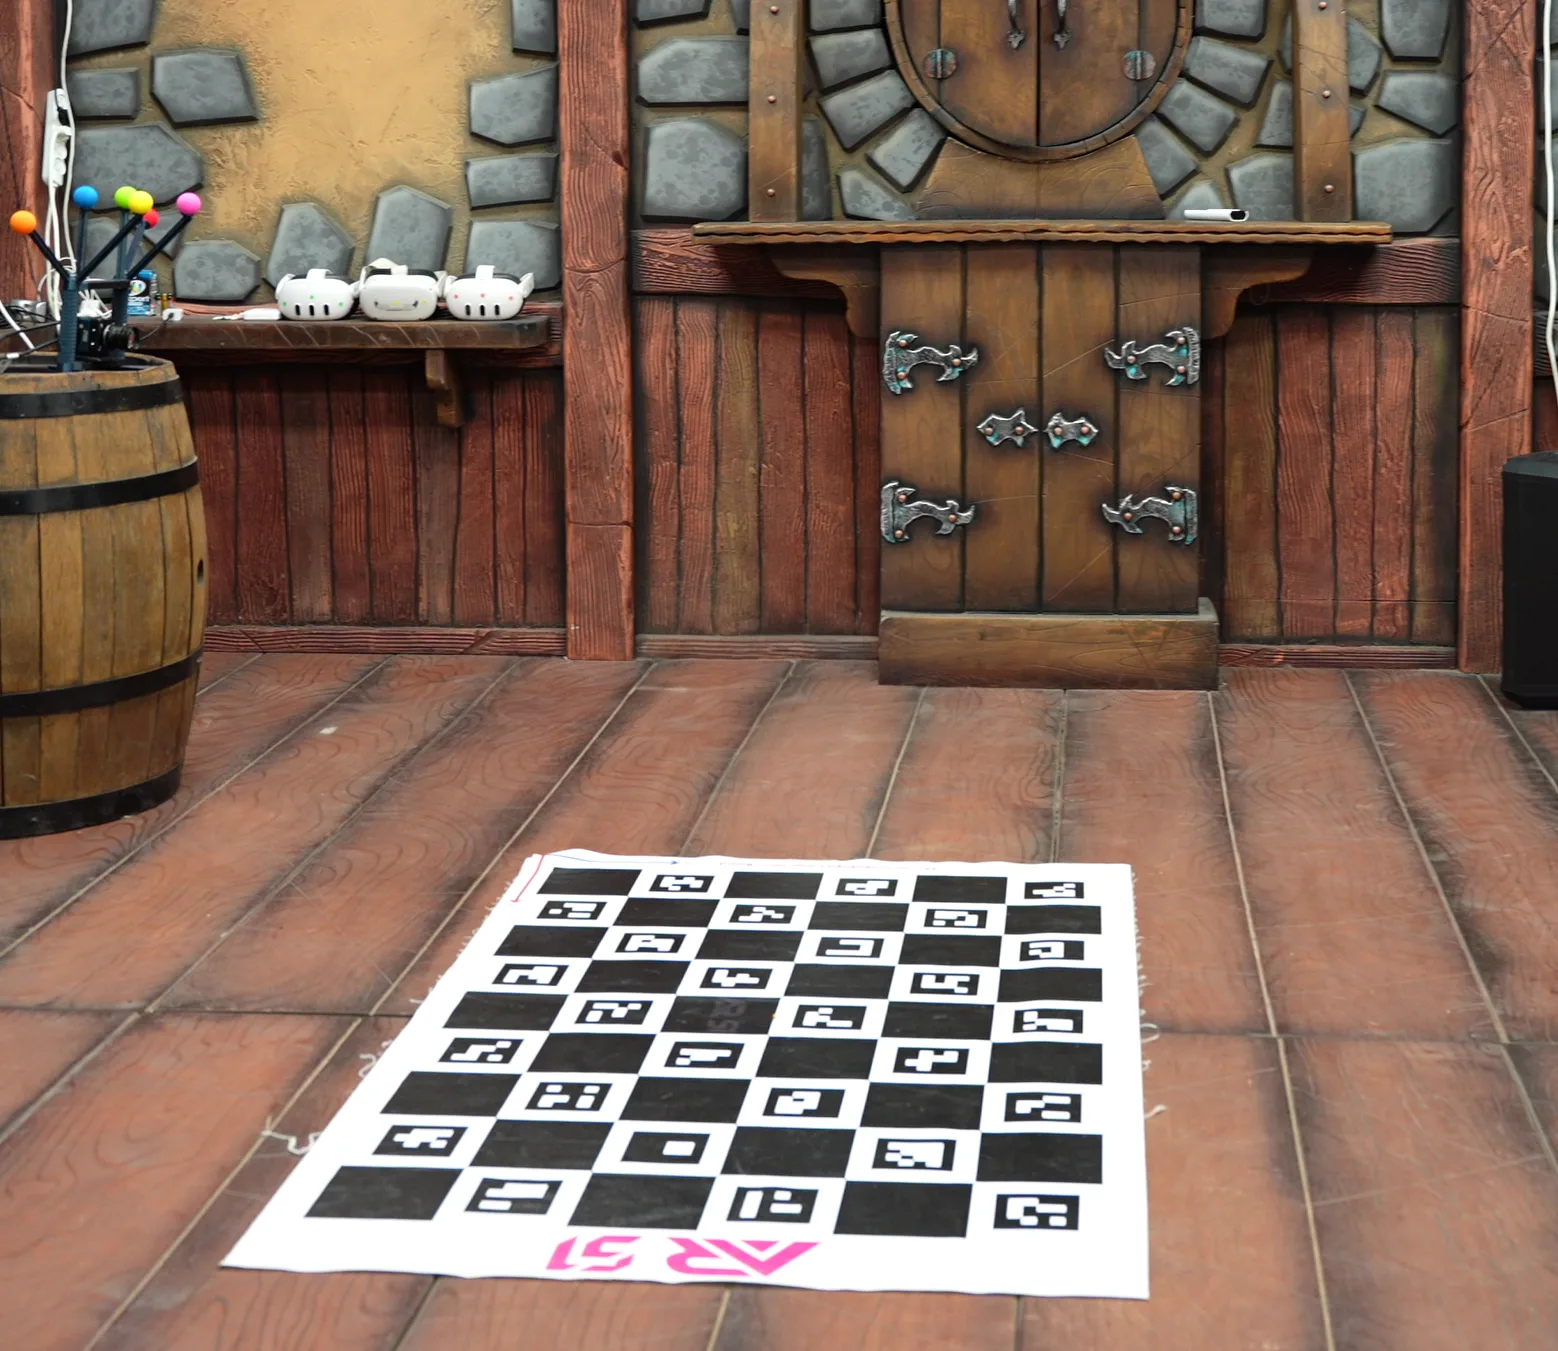
Start the camera calibration
Open at least one camera feed
The feed from the camera should reflect the various stages in the calibration process.
Click on the “Start Cam Calibration” button
-
Open Mocap Studio and navigate to the Calibration menu on the top left corner.
-
Select "Start Calibration" to activate the calibration process.
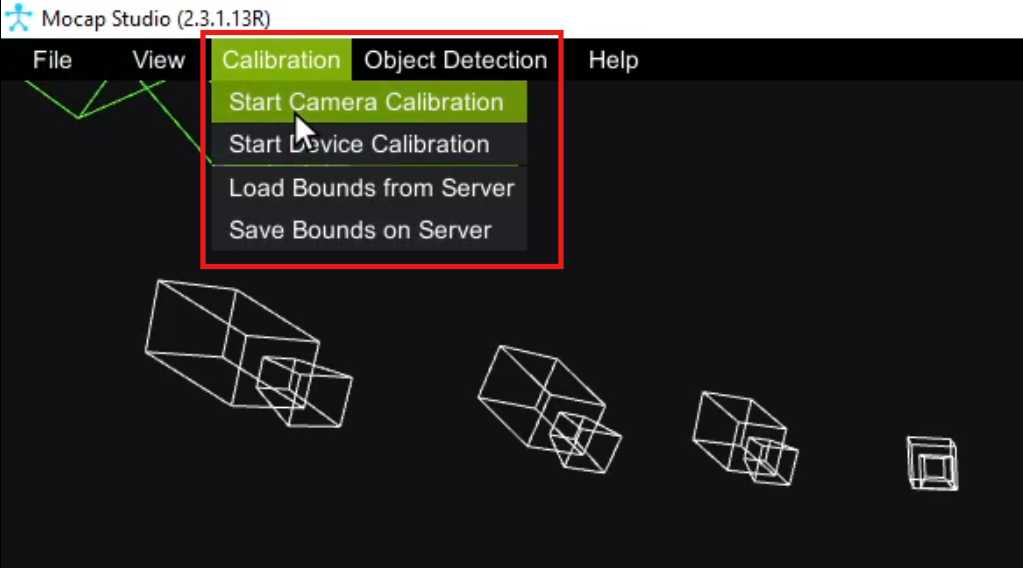
Once the calibration board detection is completed, the images in the camera feed will turn darker.
Switch on the calibration sphere
Once the feed goes dark, switch on the provided calibration sphere.
Make sure your light bulb emits a strong white light (at least 1800 lumen). Using yellow, warm light can result with a bad calibration score.
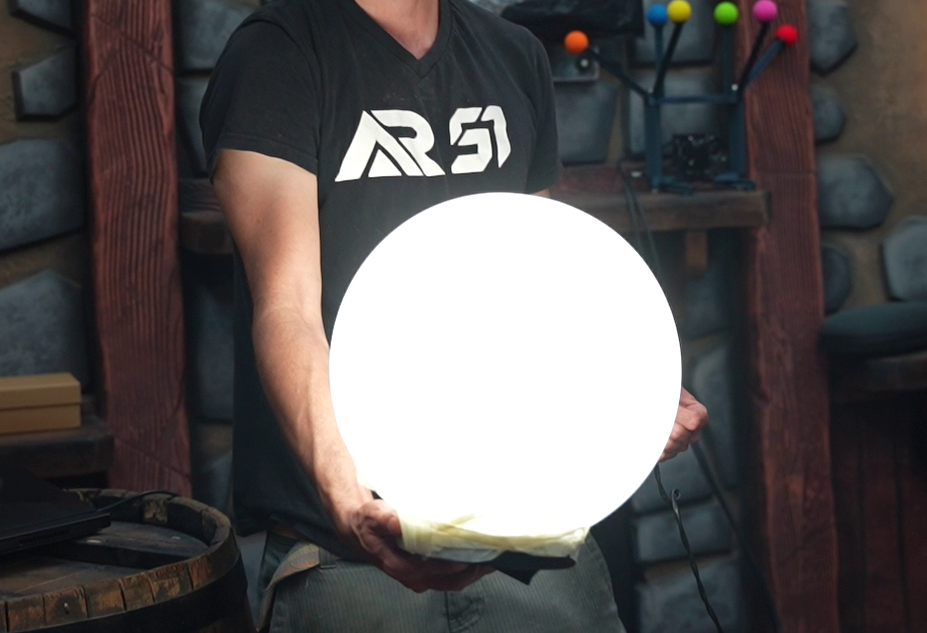
Move around the room holding the calibration sphere
-
Begin moving the calibration sphere around the room, covering as much ground as possible, including varying heights and positions. This helps in gathering a comprehensive set of data points.
-
Be thorough and systematic. Cover all areas of the room, including corners and elevated spots.
-
Frequently change the orientation of the calibration sphere to ensure diverse data points for better accuracy.
See Capture good calibration data at the top of this page for the do's and don'ts and how to read the coverage view.
Monitor the progress in Mocap Studio
You can use “Mocap Studio” to view the movement of the ball in 3D. \
Use the progress bar in the management system to monitor the progress of the calibration.
Validate in Mocap Studio
Once the calibration is completed, you can view the 3D avatars in “Mocap Studio”.