Installing Ubuntu with the Pre-Configured AR51 Mocap Unleashed System
This guide explains how to install the Ubuntu OS with the AR51 Mocap Unleashed software pre-installed and configured.
Table of contents
- Installing Ubuntu with the Pre-Configured AR51 Mocap Unleashed System
Prerequisites
Downloading the Pre-Configured Ubuntu Installation File
- Access the AR51 Files Page:
- Open your web browser and go to https://files.ar-51.com
- Locate the Ubuntu Installation File.
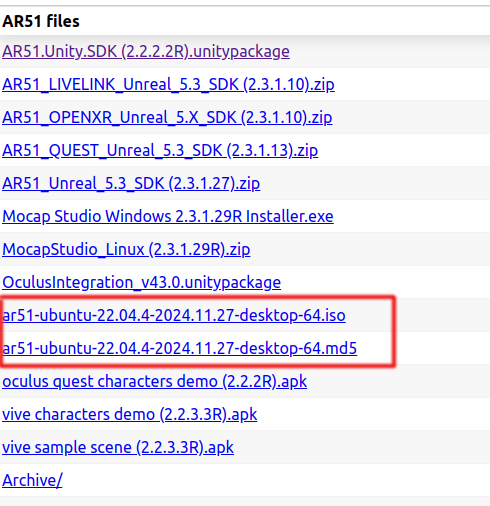
- Click the download link for the installation file and save it to your computer.
Prepare for Installation
Create a Bootable USB Drive:
Use a software like Balena-Etcher to burn the ISO to a USB flash-drive.
Ensure you have a USB drive or other media
Make sure you have a USB drive or another medium available for installing Ubuntu
Make sure the computer is connected to the internet
Ensure the computer is connected to the internet to download updates during the installation process.
Start the Installation Process
Step-by-Step Guide:
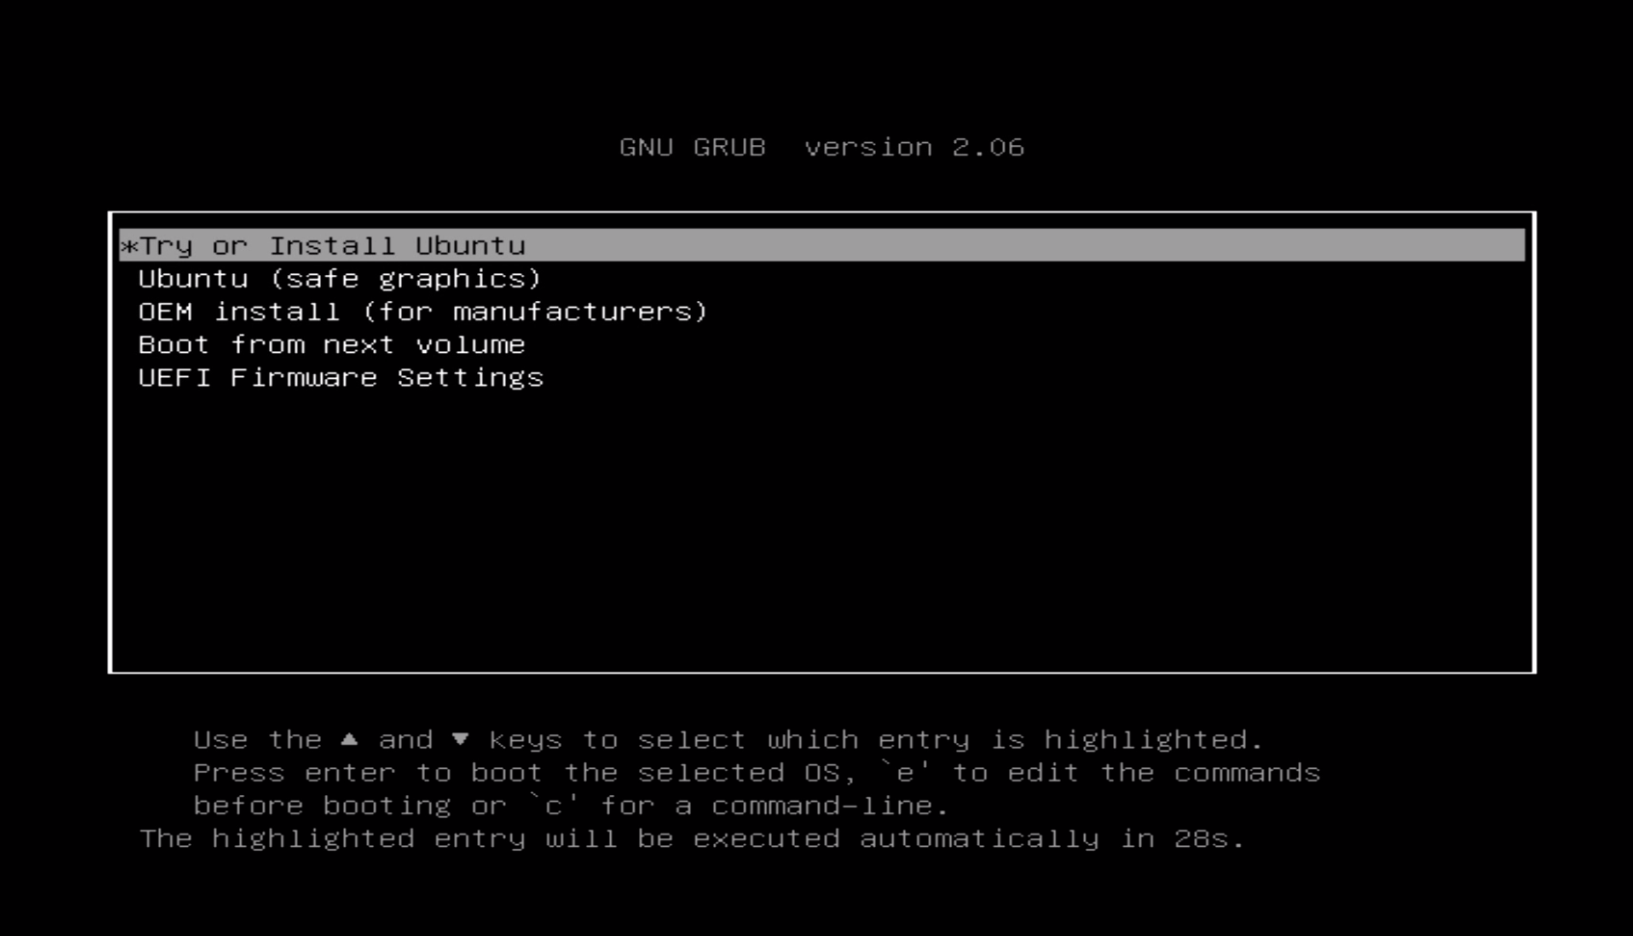
- Insert the USB drive or installation media into the computer.
- Boot your computer from the installation media.
- Once the system boots from the media, select “Try or Install Ubuntu”
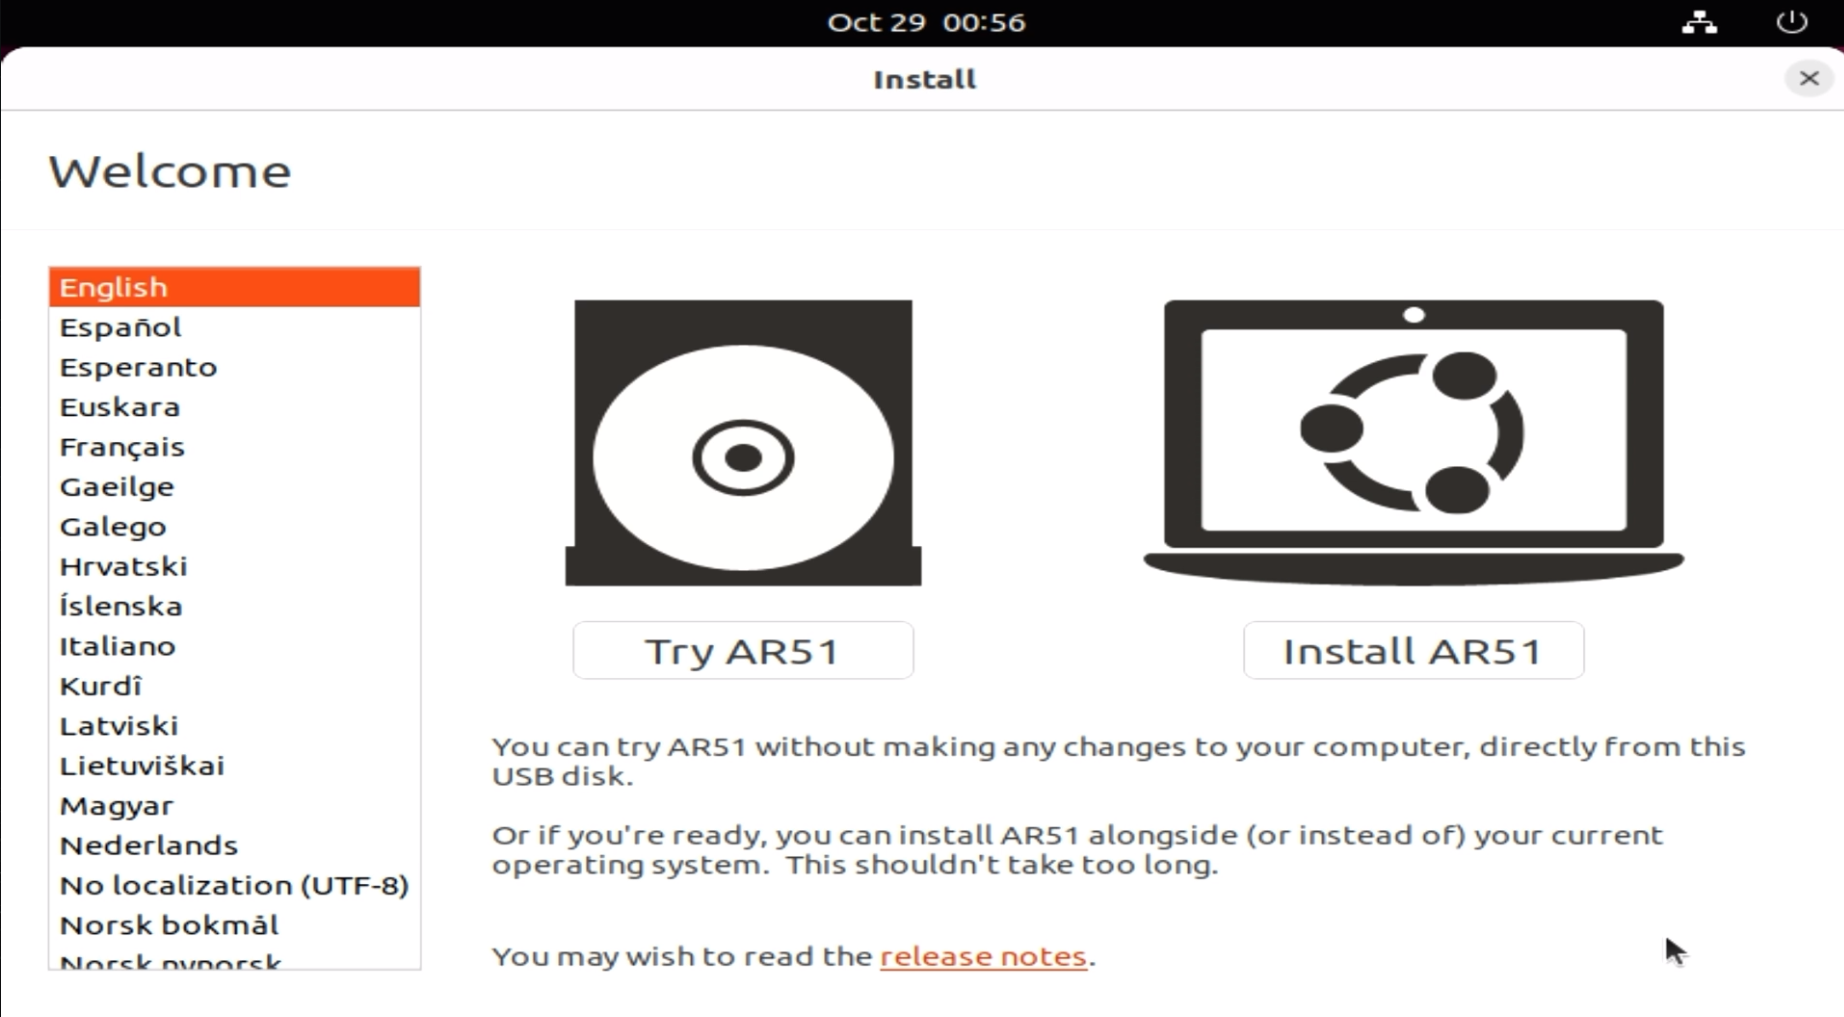
- When the installation screen appears, select “Install AR51”.
Configure Installation Options
- When prompted, select “Install Ubuntu.”
- Choose Your Preferred Language

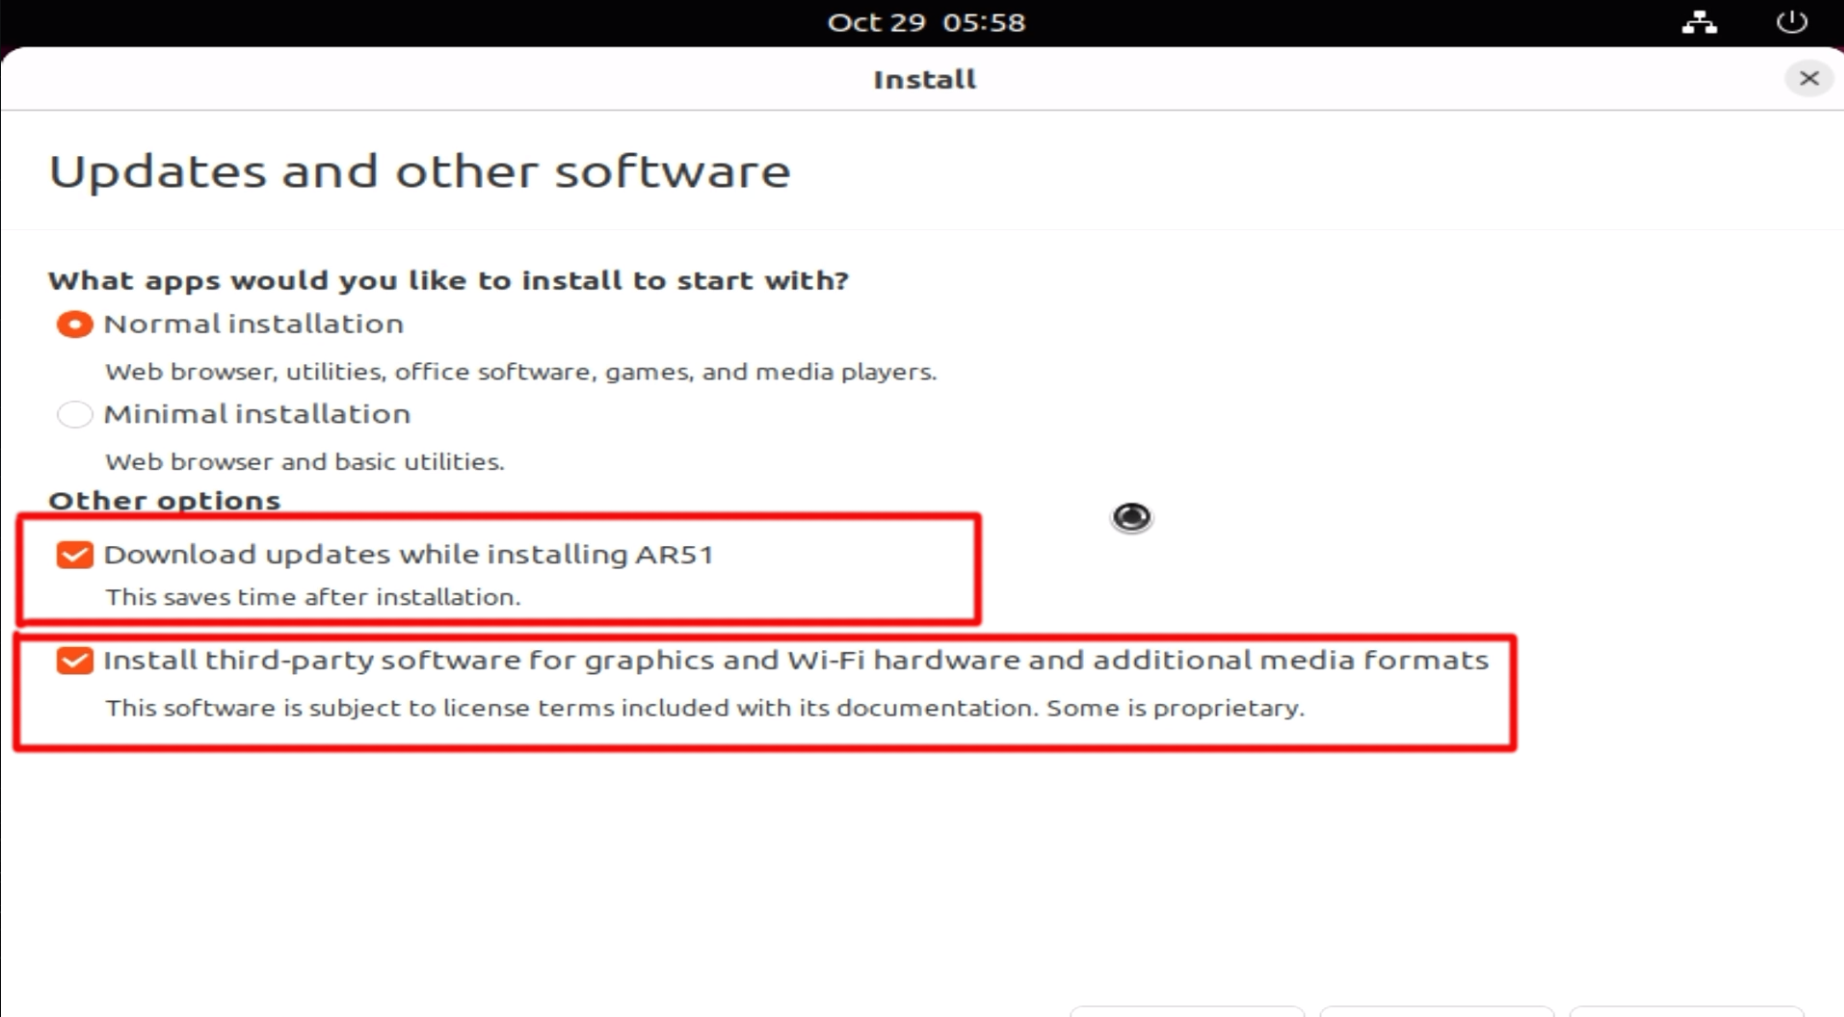
- Connect to the internet when prompted to allow Ubuntu to download updates.
- In the top-left corner, you should see a network icon. Ensure the computer is connected to the network before proceeding to the next step.
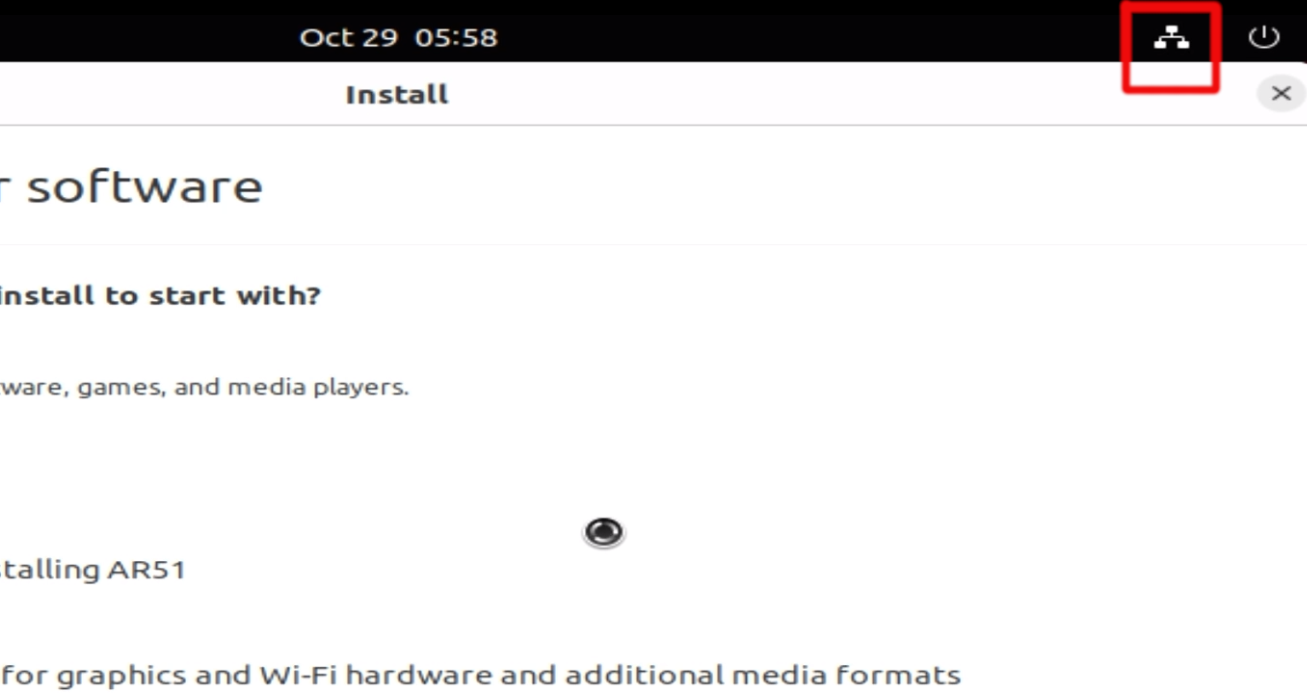
If the computer is not connected to the internet, it will be unable to download updates, which may affect system functionality.
- Check both “Download updates” and “Install third-party software…” to ensure the necessary drivers and codecs are installed.
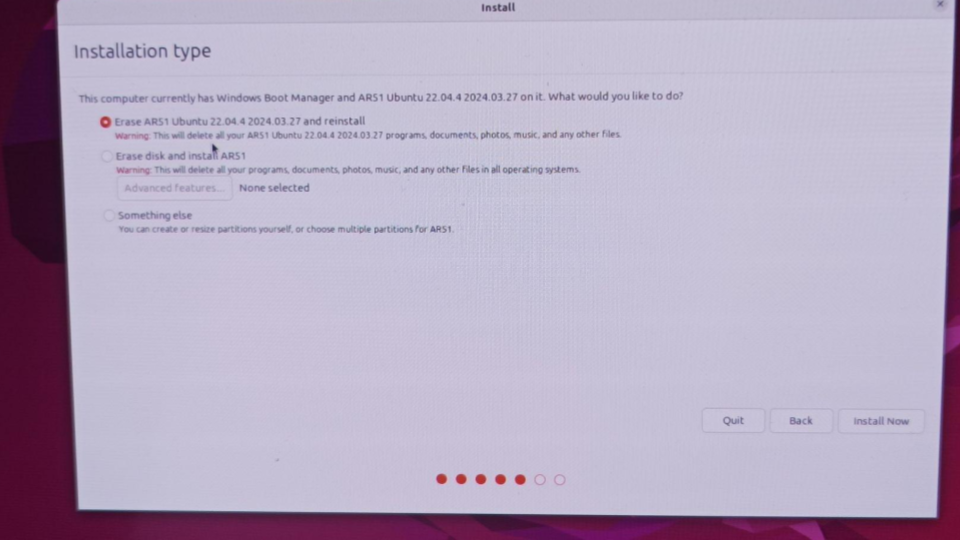
- Choose the appropriate installation type based on your setup:
- If using a clean disk, select “Erase disk and install Ubuntu.”
- If creating a custom partition, select “Something else” and configure your partitions accordingly.
- Select your location to set the time zone and click “Continue.”

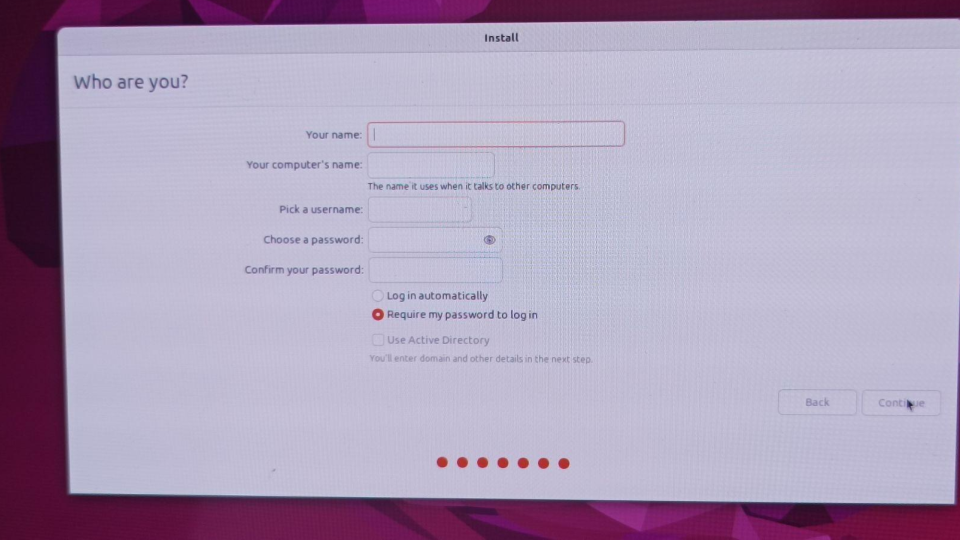
- Enter your name, computer name, and create a secure password. Then, click “Continue.”
Complete the Installation
- Follow the on-screen prompts to complete the installation process.
- Once the installation is finished, the system will prompt you to restart. Approve the restart and remove the installation media when prompted.
First Login
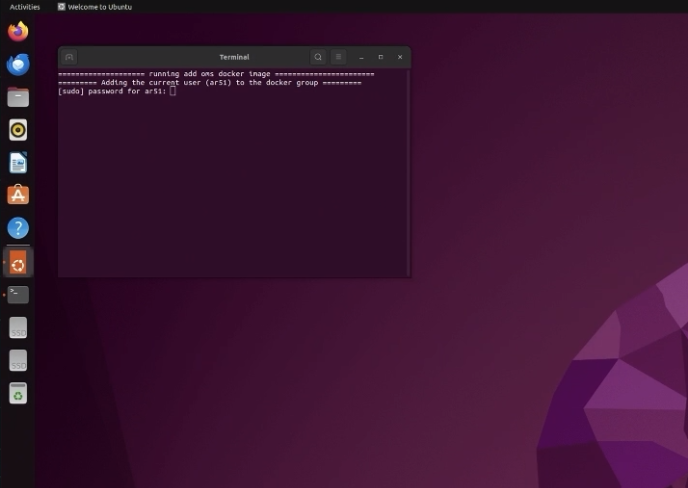
- After the system boots, enter your username and password to log in.
- Once logged in, a terminal window should appear. Enter your password when prompted to complete the installation process.
- When this process is done, you should see a change to the user wallpaper.
When using Nvidia 50XX Series Graphics card
- Open the “Additional Drivers” application from the application menu.
- Select the Nvidia-driver-575-open from the list.
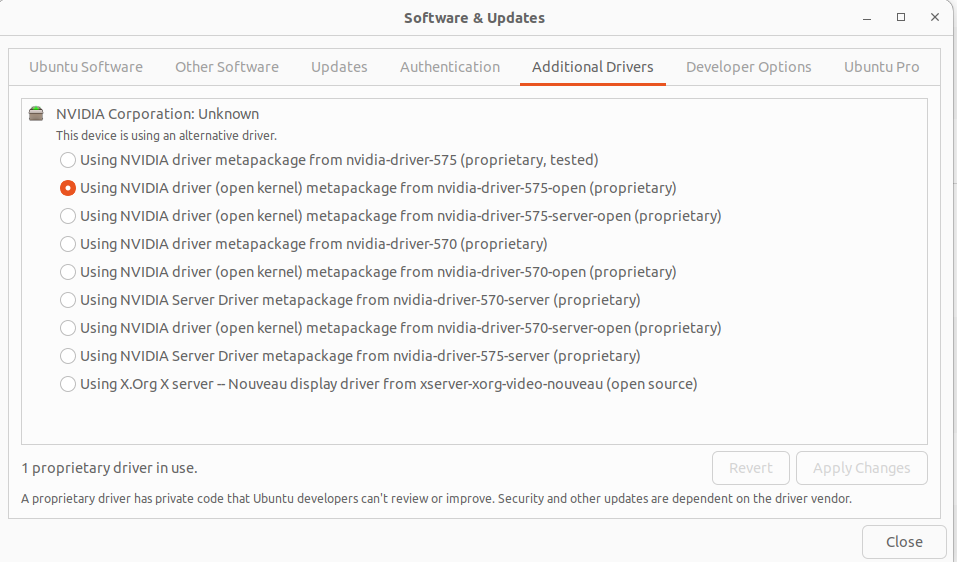
- Click “Apply Changes” to install the driver.
- Restart your computer to apply the changes.
- After restarting, open a terminal and run
nvidia-smito verify the driver installation.
Configure the Network Interfaces
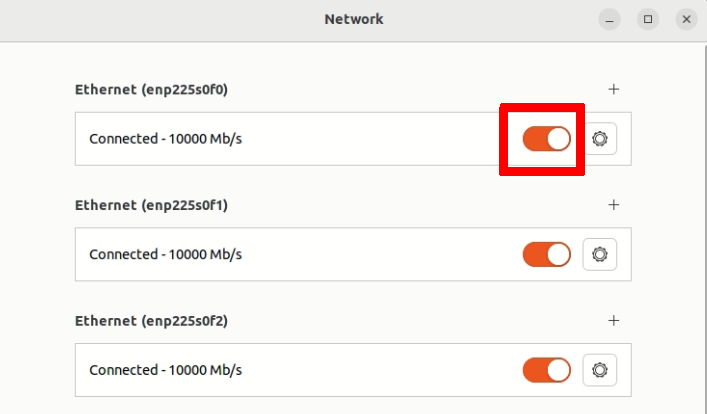
- Set the IP address and subnet for all network interfaces connected to the cameras.
- First, open the network interface settings by clicking on the network icon in the top-left corner.
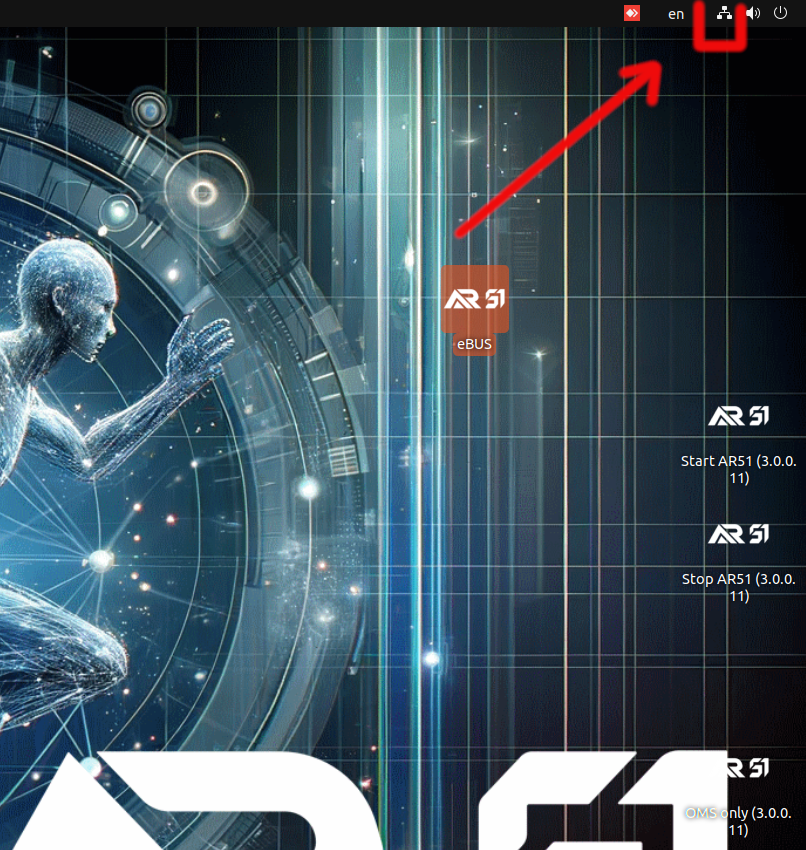
- Edit all interfaces that connect to cameras (only once if using a switch).
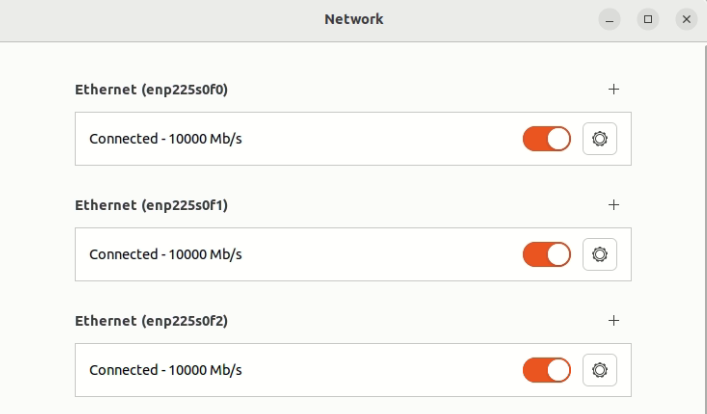
- For each interface, complete the following steps:
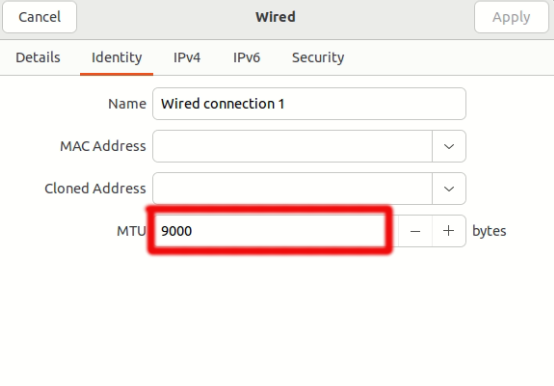
- Under the “Identity” tab, set the MTU to 9000.
Under the “IPv4” tab, configure the IP Address and Netmask.
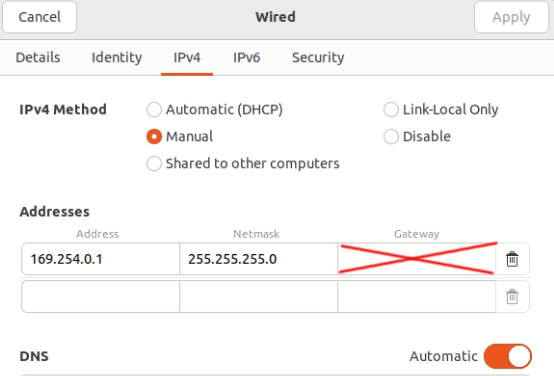
- Network configuration may vary based on site constraints. We generally recommend the following convention:
- The IP address should follow the format 169.254.X.1, where X is a unique interface ID.
- The subnet should be 255.255.255.0 .
Do not configure a default gateway for these cameras. The cameras should be in a closed-loop/isolated network.
In most cases, the interface connected to the internet (external network) should remain unconfigured.
Changing the network interface connected to the internet may disrupt your connection.
- Once completed, disable and re-enable all network interfaces to make the changes take into effect.
Set the license key and provide the machine signature
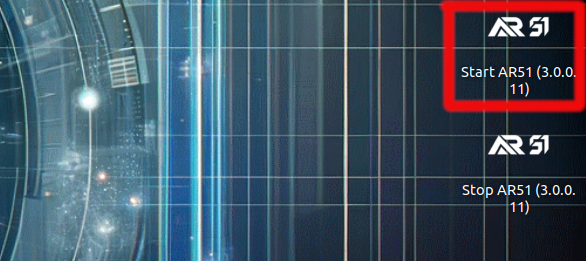
- Open the Mocap Unleashed application using the desktop icon “Start AR51…“ .
- Navigate to the Settings tab and enter the provided license key.
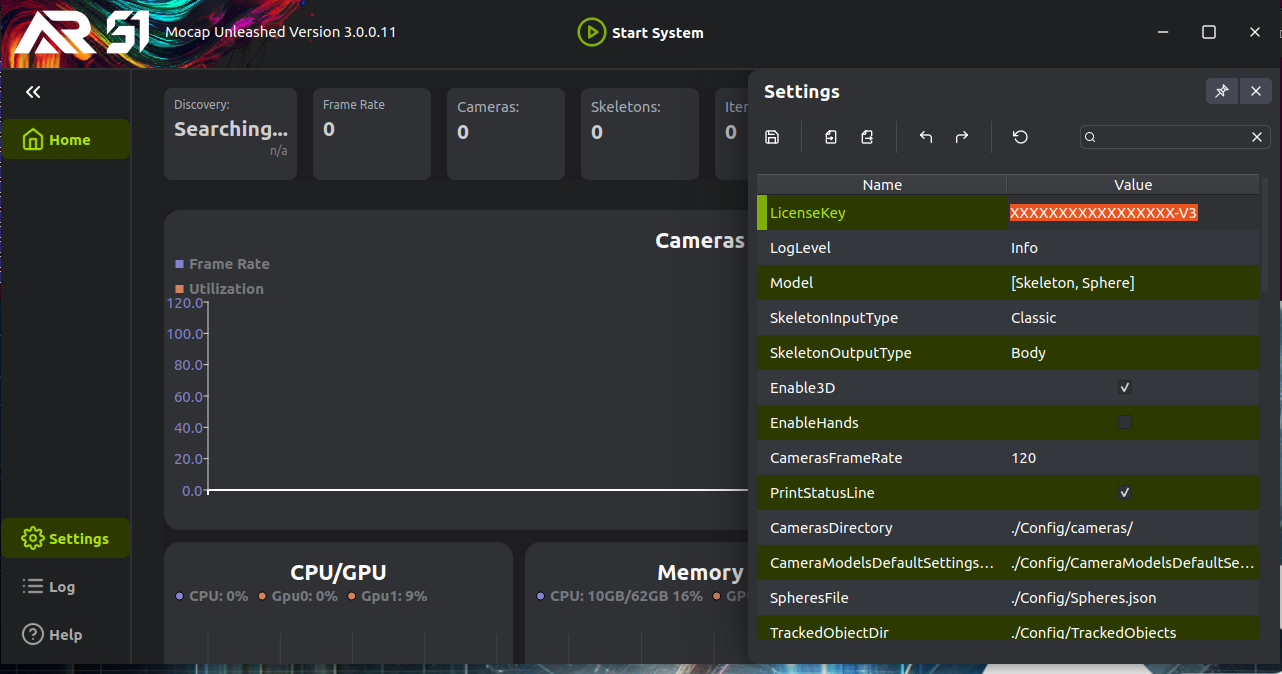
If you did not receive a license key, contact AR51 support.
- The system will display a “Machine Fingerprint”. Share this fingerprint with AR51 support.
Each license is locked to a specific machine. If you reinstall the operating system, the fingerprint may change.
If the fingerprint changes, contact AR51 support to reactivate your machine.

Provide Remote Access for Testing
- We recommend using AnyDesk for remote access.
- Provide the AnyDesk access-code to your support representative.
Done
Your pre-configured AR51 Ubuntu installation is complete.