Using AR51’s PicoXR Plugin
How to setup AR-51’s PicoXR plugin for Unreal Engine.
Table of contents
This document provides a step-by-step guide on setting up AR-51’s PicoXR Plugin in Unreal Engine.
Prerequisites
Ensure Unreal Engine is installed. Confirm that AR-51 SDK and PicoXR plugins are available and activated.
Download and Install the Plugins
Download the AR51 Plugins
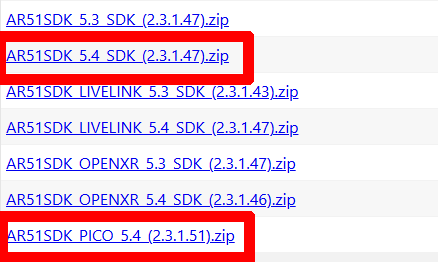
- In your browser, navigate to AR Files Storage https://files.ar-51.com
- Download the ”AR51 Unreal SDK” plugin.
- Download the ‘AR 51 SDK_Live Link’ plugin.
Download PicoXR Plugin
- Download the PicoXR Unreal plugin.
Install the Plugin
Project-Specific Installation:
- Navigate to your Unreal Engine project’s root directory.
- If a Plugins folder does not exist, create one.

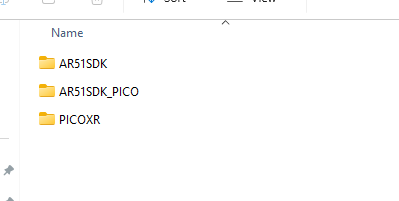
- Extract the content of the downloaded plugins into the Plugins folder.
- The Plugins folder should contains the three plugins: AR51SDK, AR51SDK_PICO, PicoXR
Activating the Plugins
- Open Unreal Engine and your project.
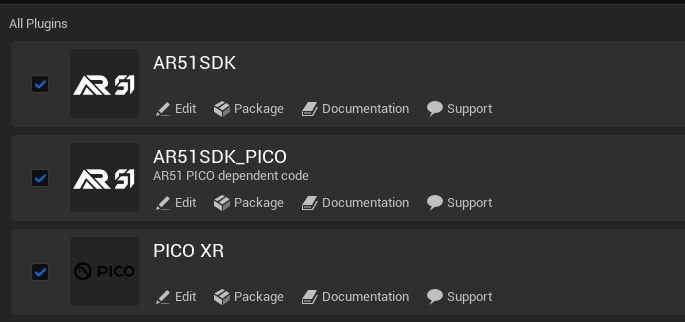
- Go to Edit > Plugins.
- In the Plugins window, use the search bar to find ‘Live Link’ and ‘AR 51 SDK_PICO.’
- Ensure both AR51 SDK_PICO and AR51 SDK are enabled by checking their respective boxes.
Disable OpenXR plugins
- Open Unreal Engine and your project.
- Go to Edit > Plugins.
- In the Plugins window, use the search bar to find ‘openXR’.
- Ensure all openXR and AR51 SDK are enabled by checking their respective boxes.

Unreal Project Settings
Make sure the project is set using the PICO development guidelines
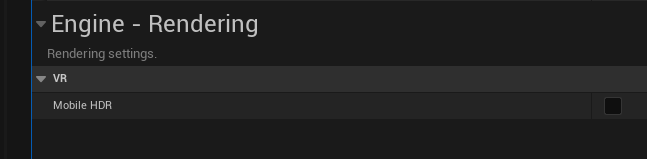
Disable Mobile HDR
- Go to the top menu and select Edit.
- Choose Project Setings .
- Under Engine - Rendering submenu VR find the option for “Mobile HDR” and disable it.
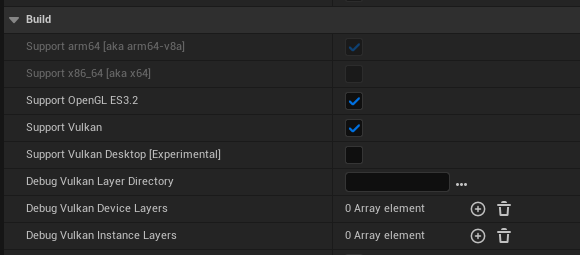
Add Support for Vulkan and OpenGl
- Go to the top menu and select Edit.
- Choose Project Setings .
- Under Android - “build” submenu, add support for Vulkan and OpenGl.
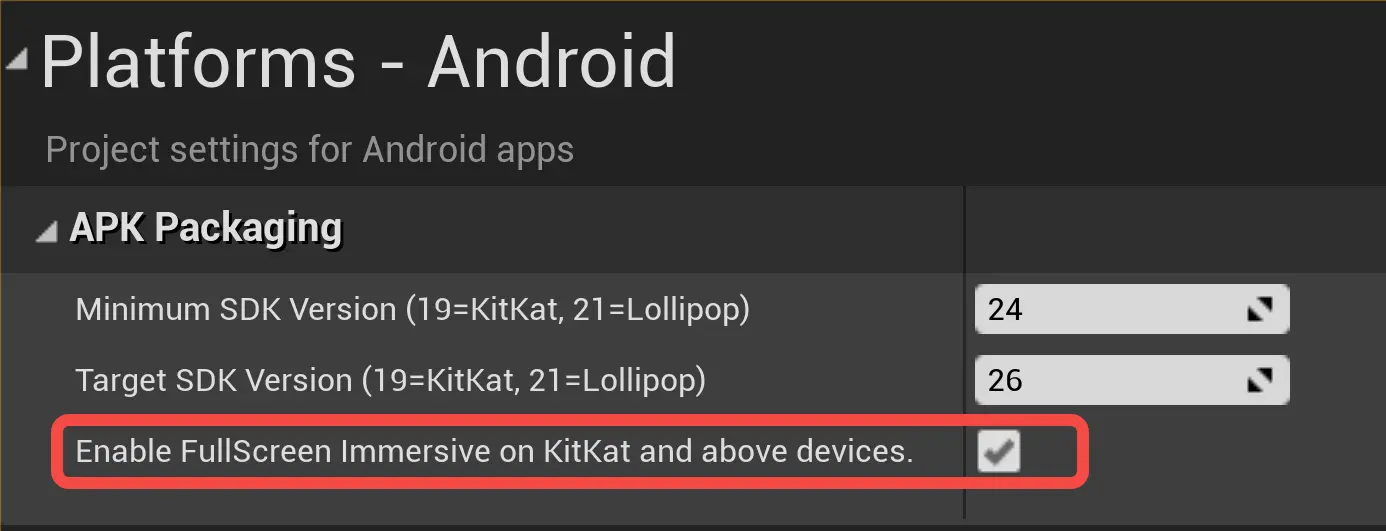
Enable fullscreen in Kitkat
- Go to the top menu and select Edit.
- Choose Project Setings .
- Under Android - “build” submenu, add support for Vulkan and OpenGl.
Enable hands as a valid VR controller
- Go to the top menu and select Edit.
- Choose Project Setings .
- On the left table of content select Plugins and then PICOXR Settings
- Under HandTRacking Support, make sure either “Controllers and Hands” or “Hands Only” are selected.

In a tethered deployment - enable “Start in VR”
Before deploying to a tethered application (PC VR app), be sure that you project is set to start in VR. In Unreal-Engine, under “Project Settings” -> “Project Description” enable “Start in VR”. 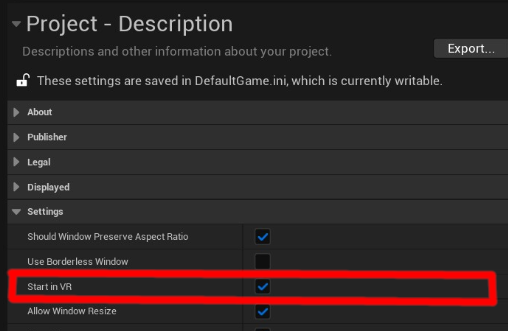
Set the New Level
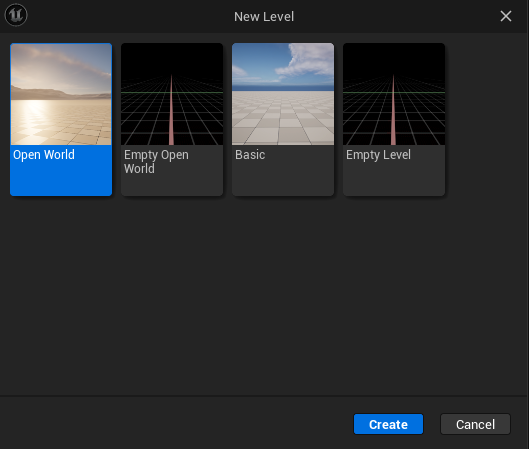
Create a New Unreal Level
- On the menu press on “File” => “New Level…”
- Select your desired level from the templates
Drag the AR51SDK blueprint into the current Level and zero it’s transform
- In the Content Brwoser, navigate to Plugins/AR51SDK Content.
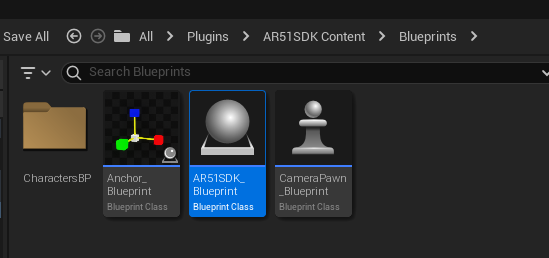
- Drag the AR51SDK_Blueprint into current level
- Zero the transform of AR51SDK_Blueprint
Drag the neccessery blueprints into the current Level and zero it’s transform
In the Content Brwoser, navigate to Plugins/AR51SDK_PICO Content.
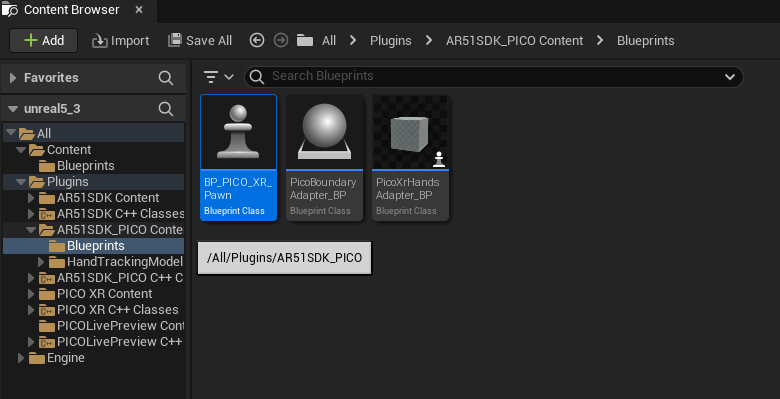
- Drag the BP_PICO_XR_Pawn into current level
- Zero the transform of BP_PICO_XR_Pawn
- Drag the PicoXRHandsAdapter_BP into current level
- Zero the transform of PicoXRHandsAdapter_BP
- Drag the PicoBoundaryAdapter_BP into current level
- Zero the transform of PicoBoundaryAdapter_BP
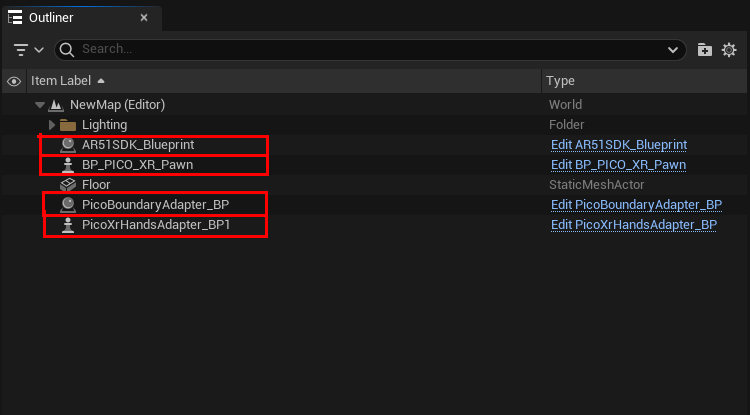
- Your current level should now contain all three blueprints
Make sure your VrPawn object uses “stage tracking”
Edit the provided VRPawn Blueprint. Make sure that your tracking space is set to “Stage” 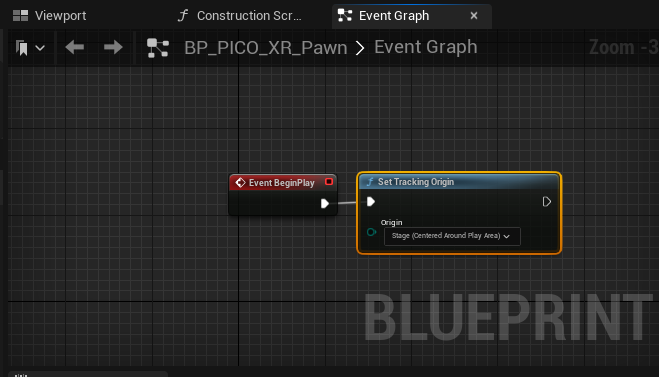
Hit Play
Make sure that AR51’s system is running on the same local network as your device.
You should see the character move in realtime  .
.
On your first run, perform device calibration
You should now perform device calibration so that the character would position on your body.