Using AR51’s LiveLink Plugin
Setting up Live Link for AR-51 in Unreal Engine.
Table of contents
- Prerequisites
- Download and Install the Plugins
- Opening Virtual Production
- Creating a Live-Link Character using the Animation Blueprint
- Testing the Setup
- Conclusion
This document provides a step-by-step guide to setting up Live Link for AR-51 in Unreal Engine.
Prerequisites
Ensure Unreal Engine is installed. Confirm that AR-51 SDK and Live Link plugins are available and activated.
Download and Install the Plugins
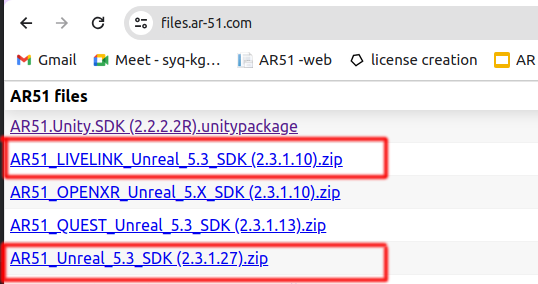
Download the Plugins
- In your browser, navigate to AR Files Storage https://files.ar-51.com
- Download the ”AR51 Unreal SDK” plugin.
- Download the ‘AR 51 SDK_Live Link’ plugin.
Install the Plugin
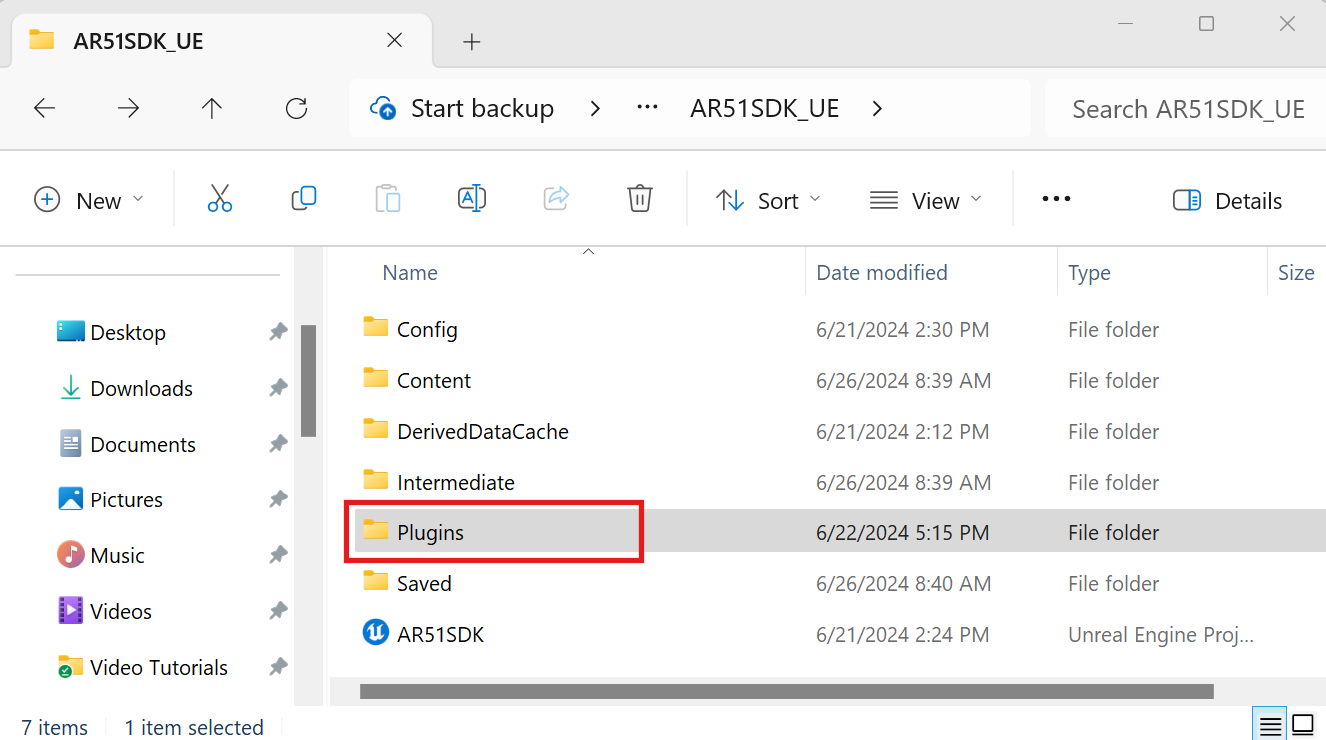
Project-Specific Installation:
- Navigate to your Unreal Engine project’s root directory.
- If a Plugins folder does not exist, create one.
- Extract the content of the downloaded plugins into the Plugins folder.
Engine-Wide Installation:
- Navigate to the Unreal Engine installation directory (e.g., “C:\Program Files\Epic Games\UE_X.YY\Engine\Plugins\Marketplace").
- Extract the content of the downloaded plugins into this folder. Note: Plugins installed here will be available for all projects using this Unreal Engine version.
Activating the Plugins
- Open Unreal Engine and your project.
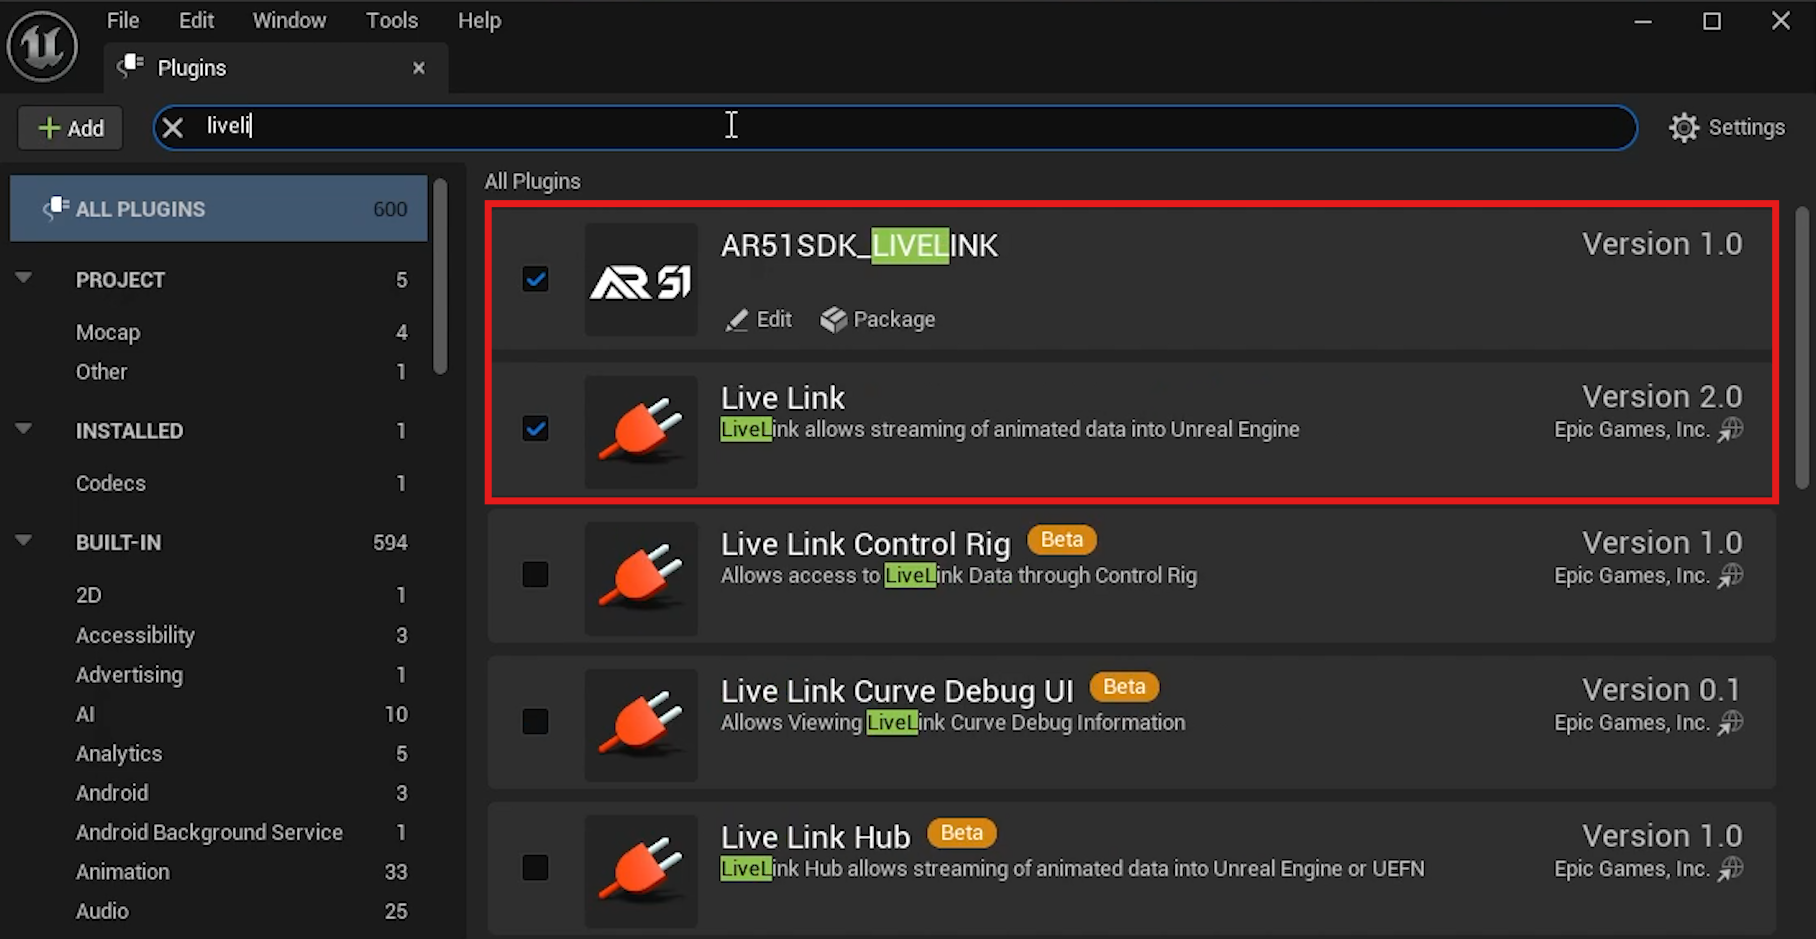
- Go to Edit > Plugins.
- In the Plugins window, use the search bar to find ‘Live Link’ and ‘AR 51 SDK_Live Link.’
- Ensure both AR51 SDK_Live Link and AR51 SDK are enabled by checking their respective boxes.
Opening Virtual Production
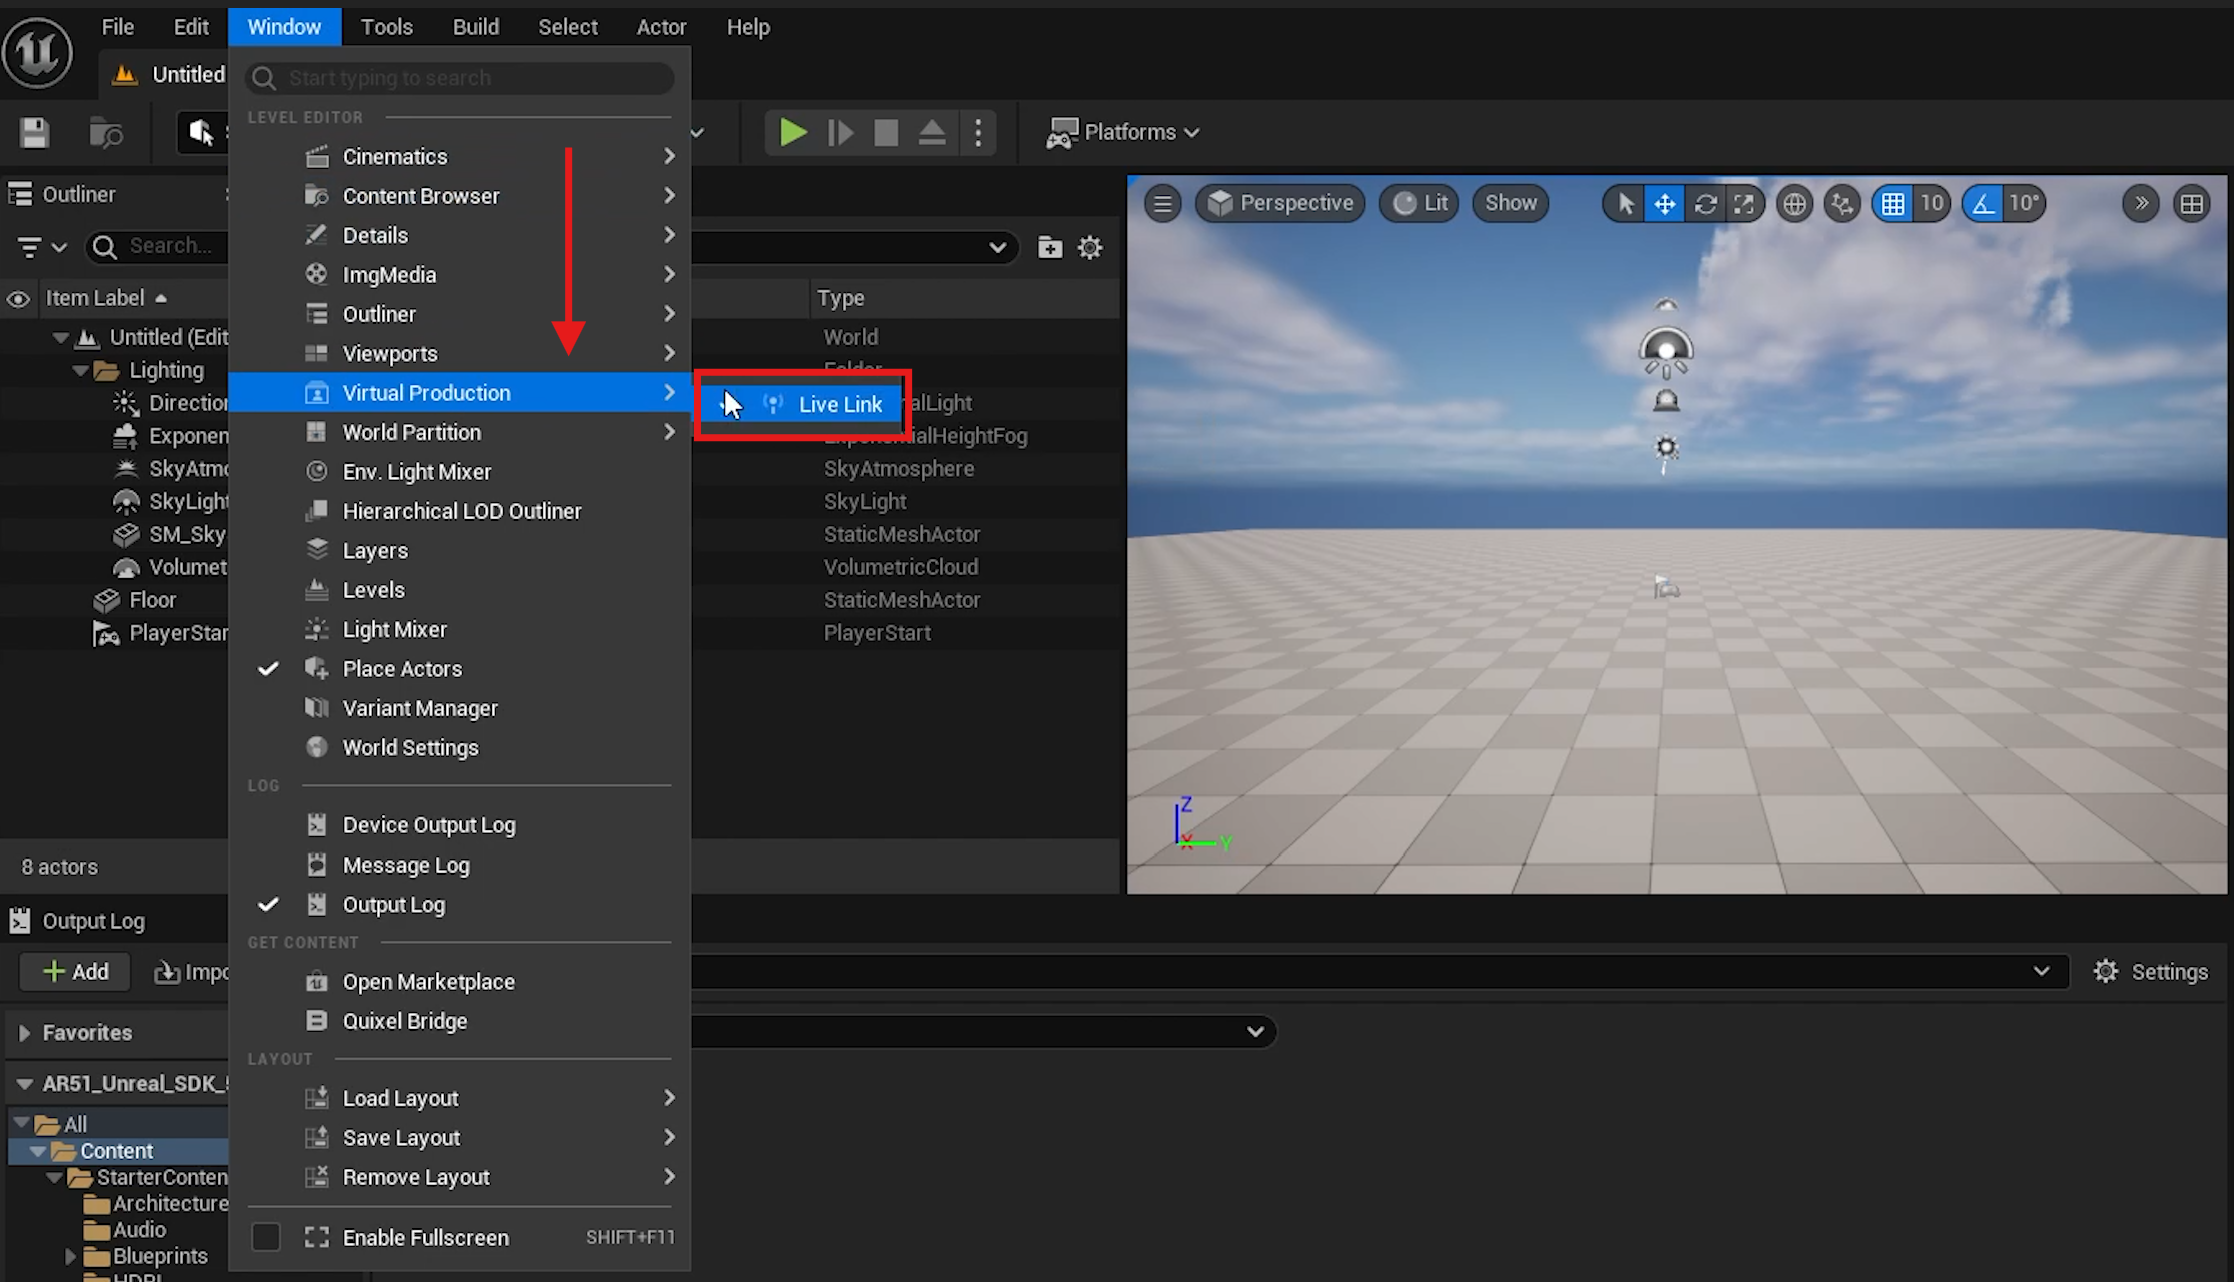
- Go to the top menu and select Window.
- Choose Virtual Production and then Live Link.
Adding AR 51 Live Link Source
- In the Live Link panel, click Add Source.
- Select AR51 Live Link from the list.
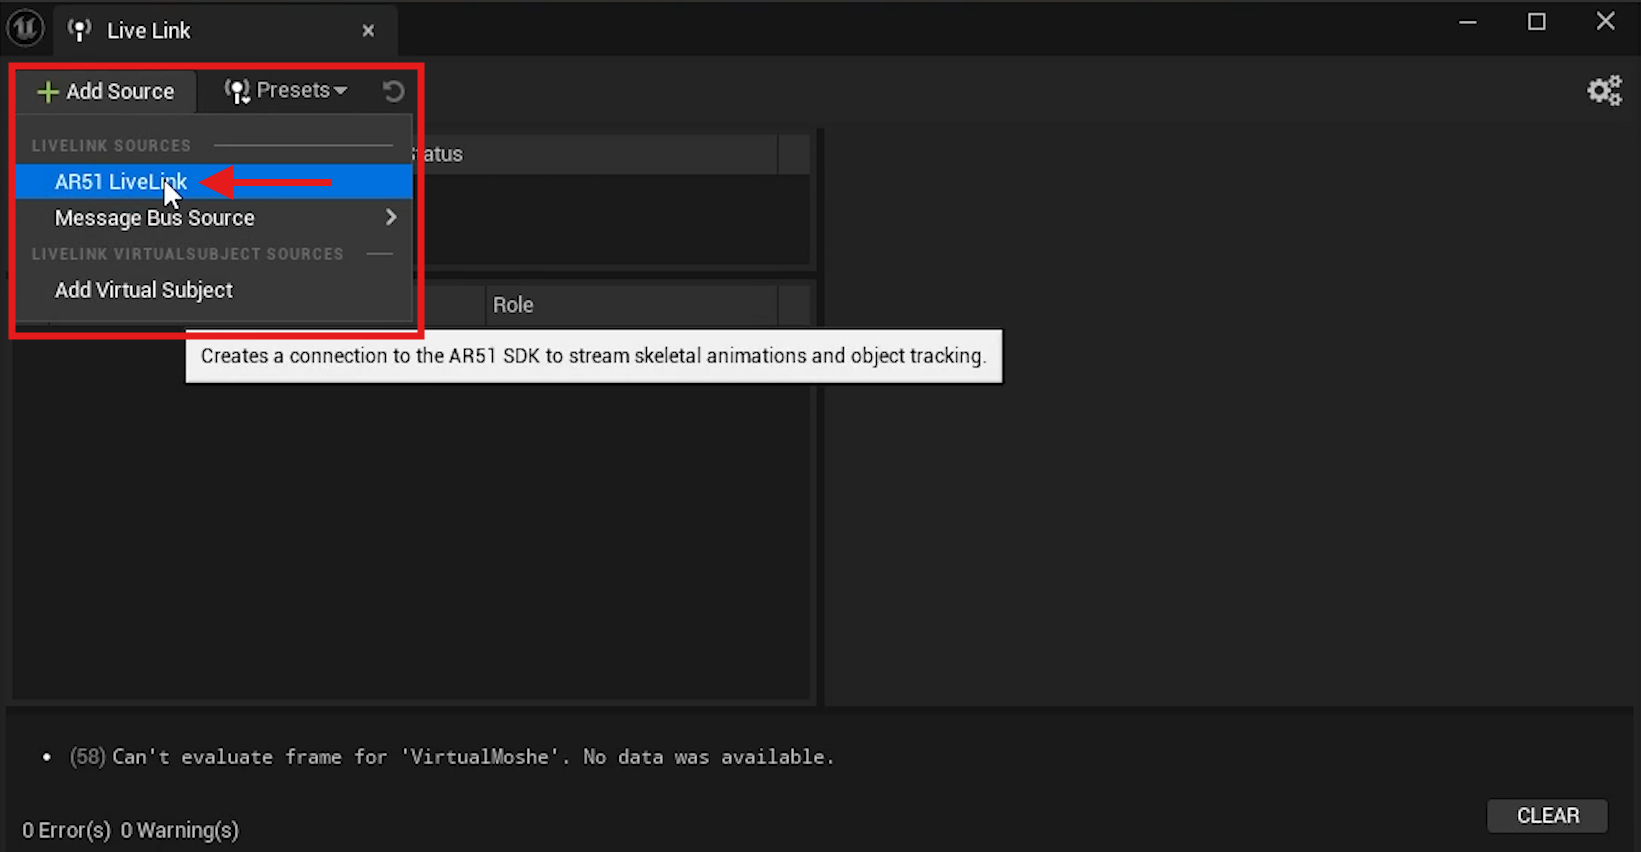
- The source type should appear as AR51 Live Link and will appear with the status: Not Connected.

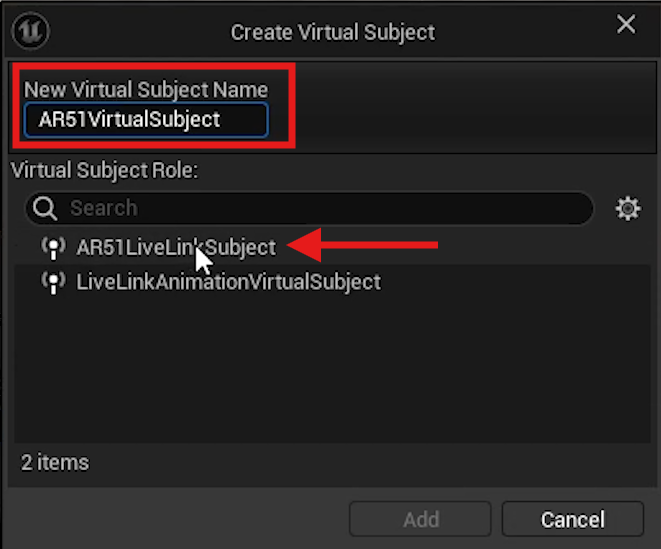
Adding Virtual Subject
- Click Add Source again in the Live Link panel.
- Select Add Virtual Subject.
- Provide a name for your subject (e.g. AR51VirtualSubject).
- Under the options, select AR51LiveLinkSubject.
- Click Add.
Creating a Live-Link Character using the Animation Blueprint
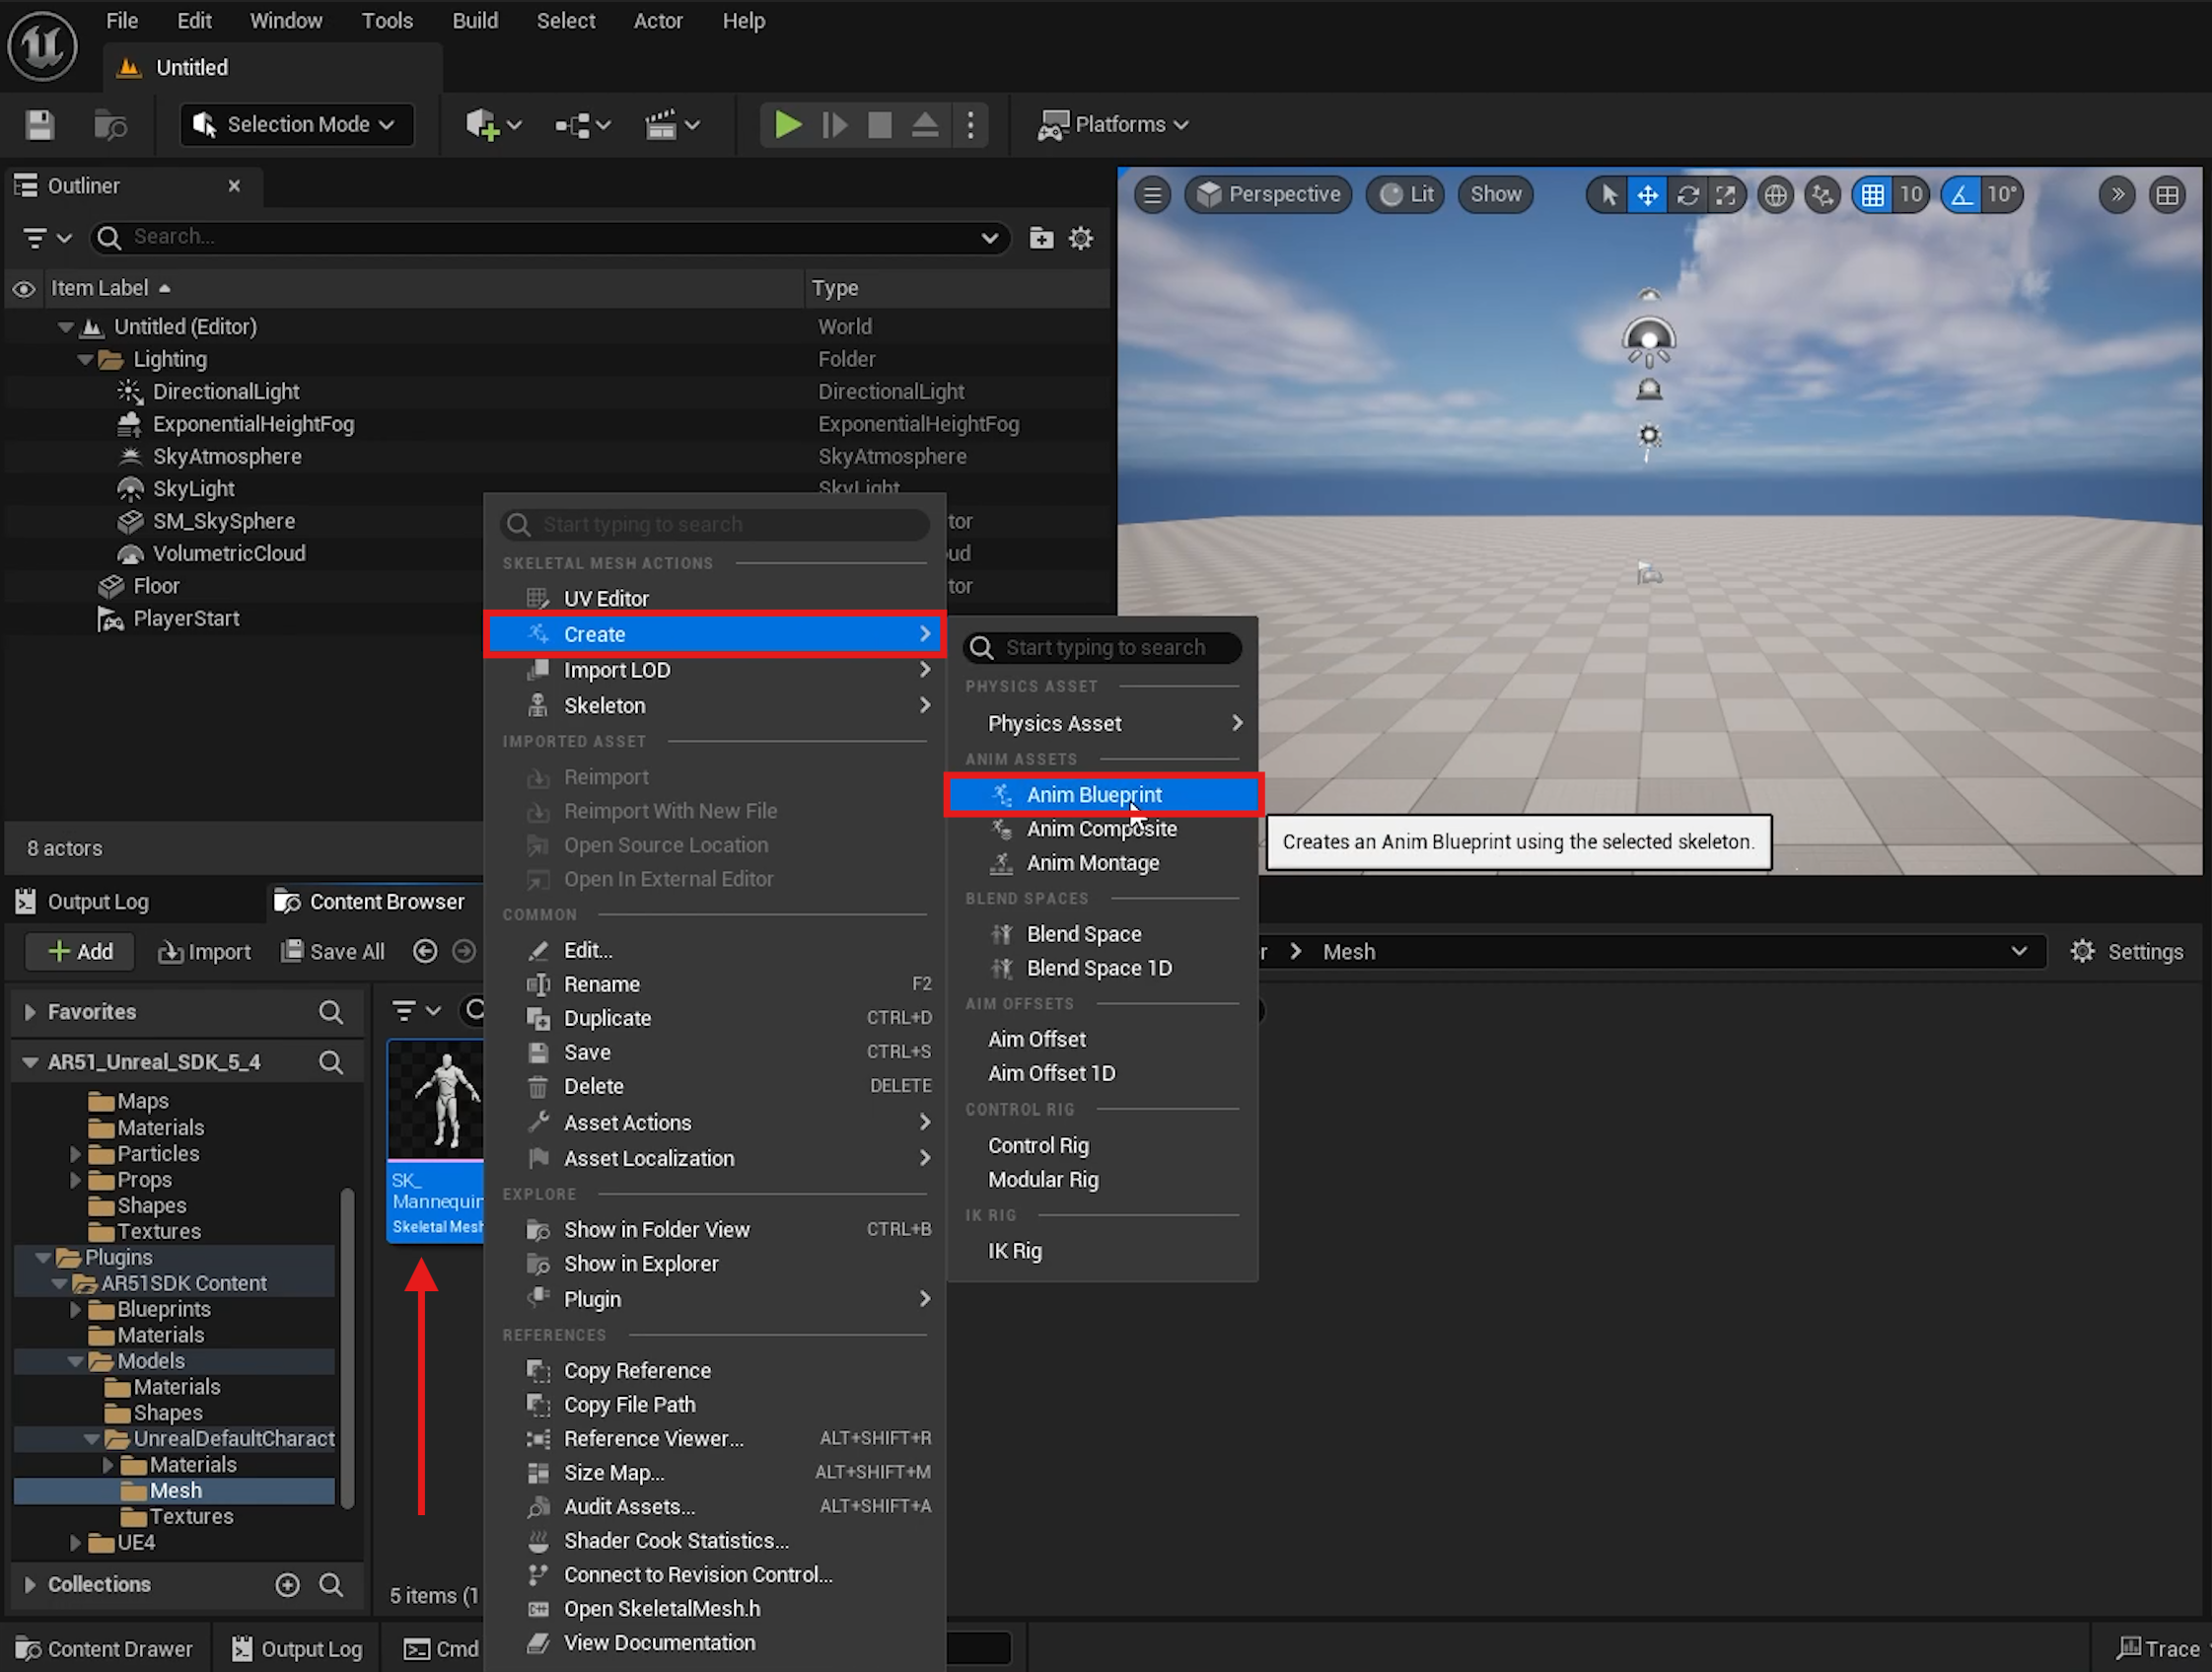
Creating and Setting Up Blueprint
- In the Content Browser, go to Plugins > AR 51 SDK Content > Models > Unreal Default Character > Mesh.
- Locate the SK_Mannequin skeletal mesh.
- Right-click on it, select Create, and then choose Anim Blueprint.
- Name the new blueprint AR 51 SDK Live Link Character.
- Move this blueprint to your project’s Content folder.
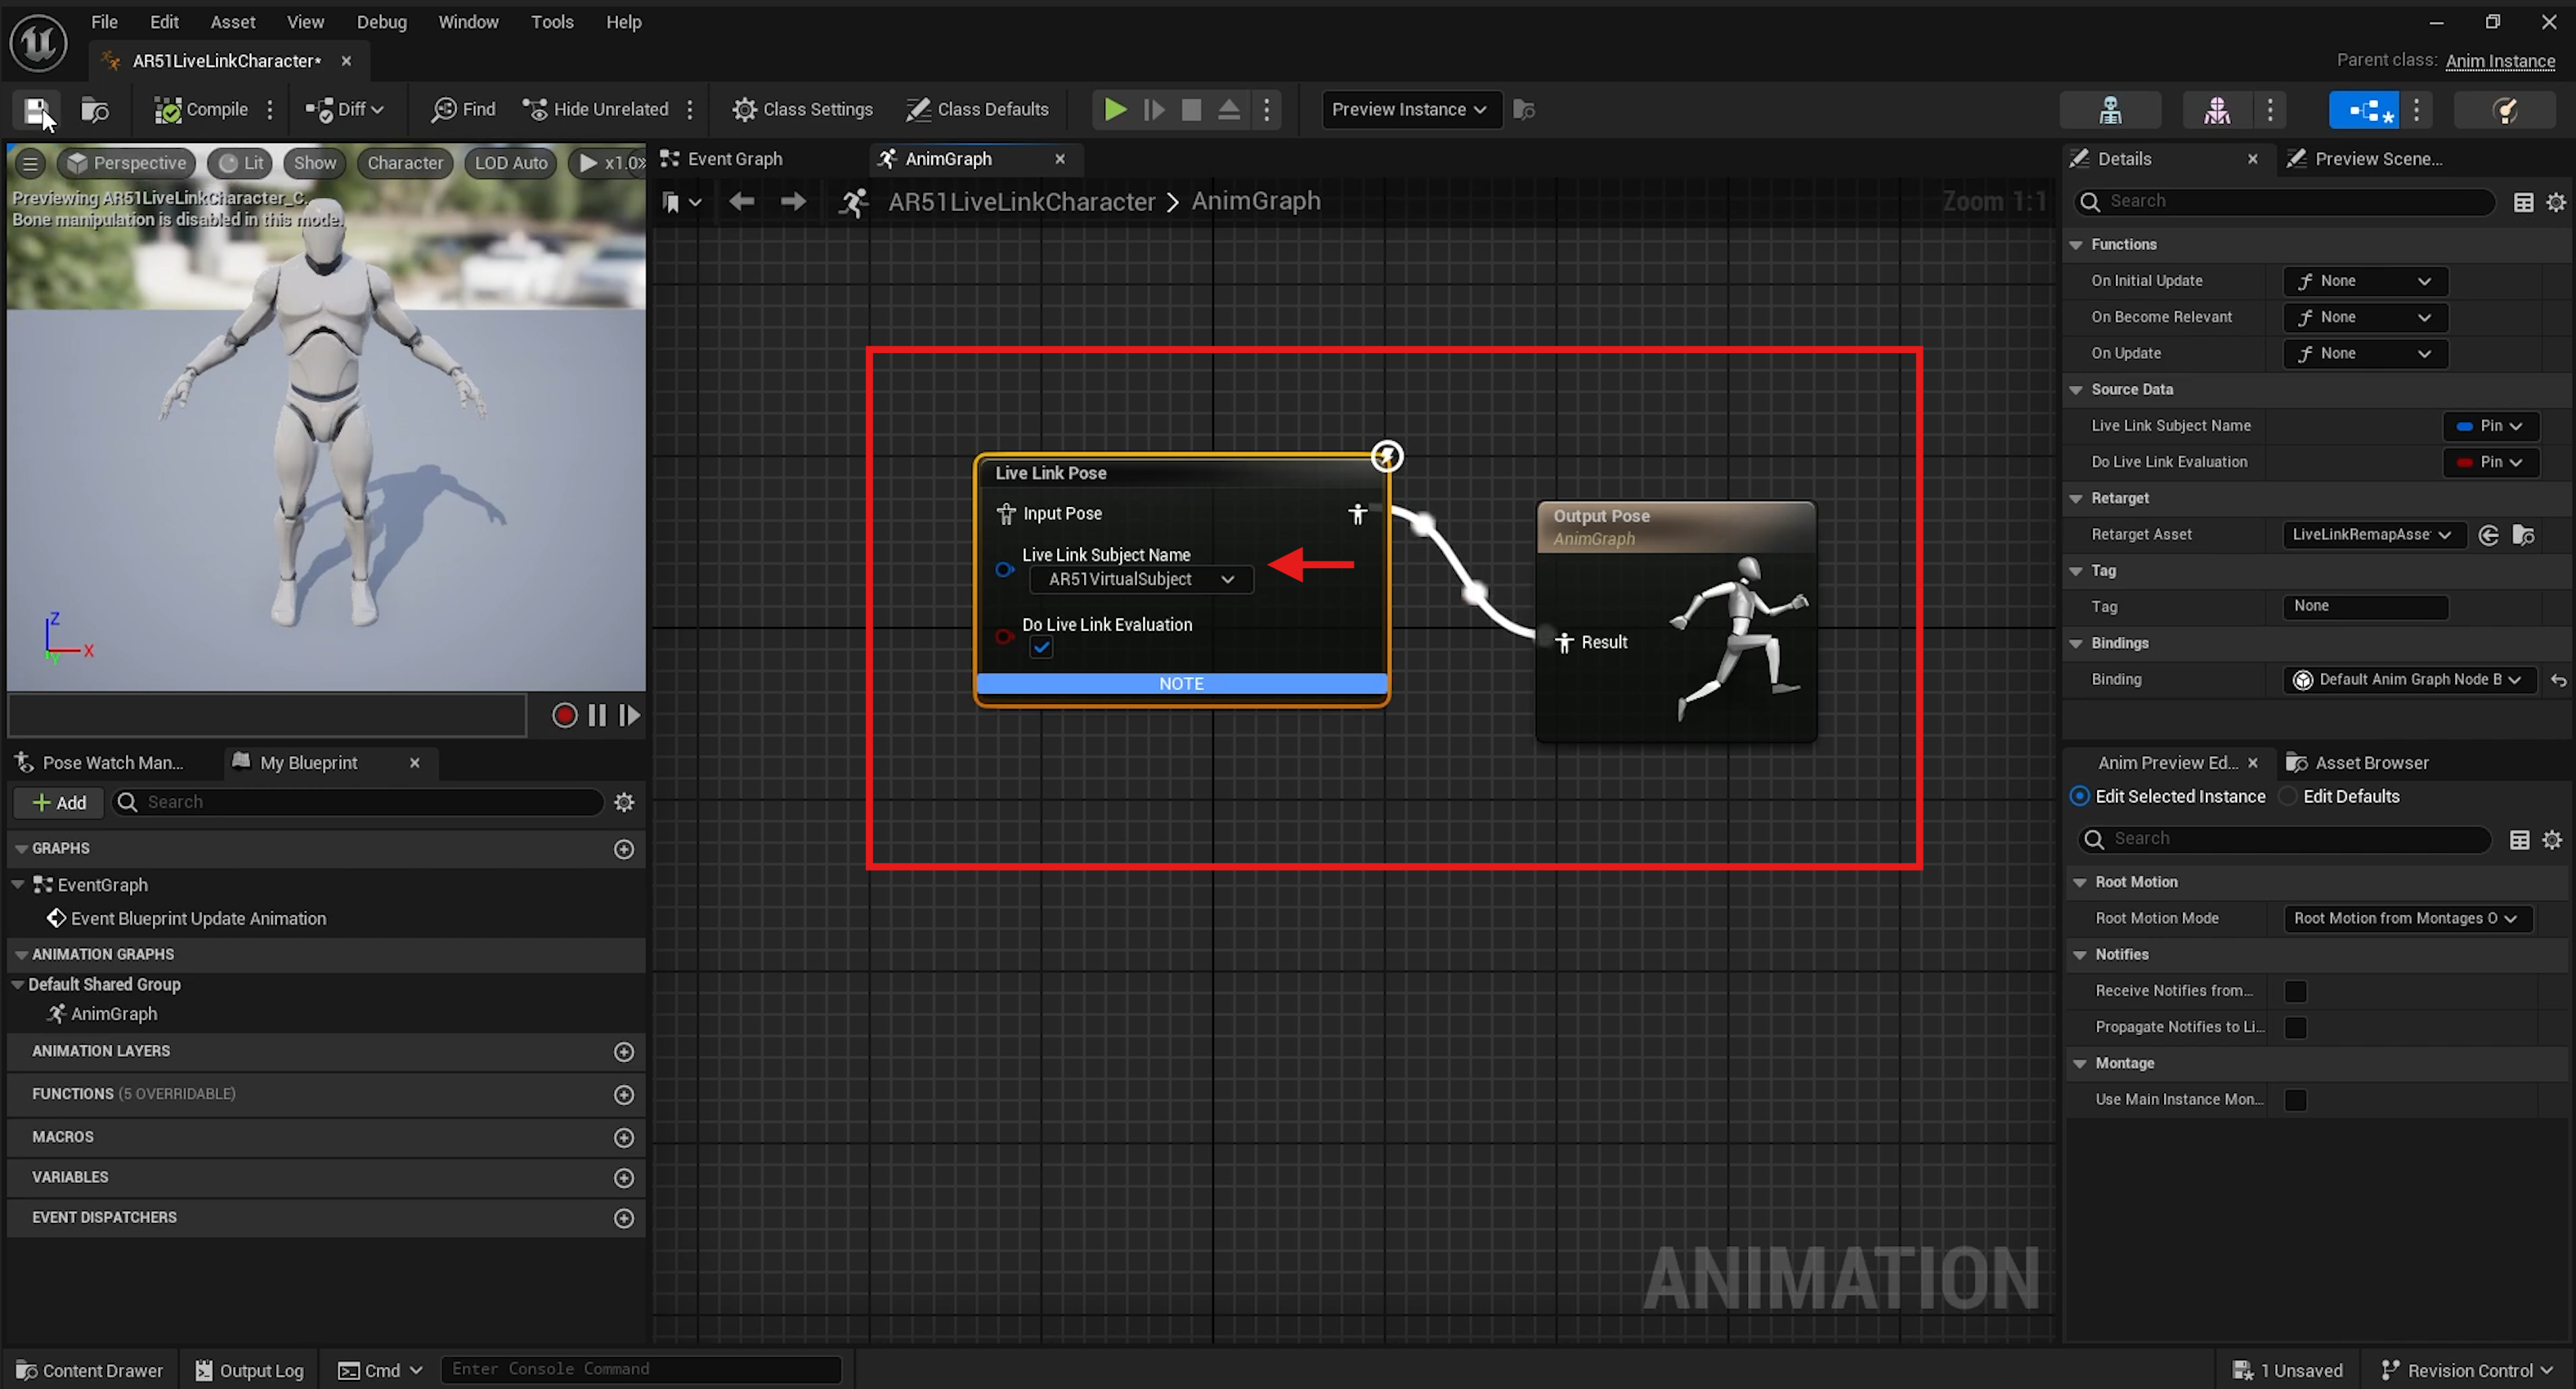
Configuring the Blueprint
- Open the newly created blueprint.
- In the blueprint editor, right-click on an empty space and search for Live Link Pose.
- Add the Live Link Pose node.
- Connect the Input Pose to the Result Pose.
- In the Live Link Subject Name field, select AR 51 Virtual Subject.
- Click Compile to save the changes.
Testing the Setup
Drag AR 51 SDK Live Link Character into the level
- Drag and drop the AR 51 SDK Live Link Character blueprint into your level.
- Reset its location to (0,0,0) to center it.
Drag AR 51 SDK into the level
- Drag and drop the AR 51 SDK blueprint into your level.
- Reset its location to (0,0,0) to center it.
Play and Examine the Live-Link connection.
- Press Play to start the scene.
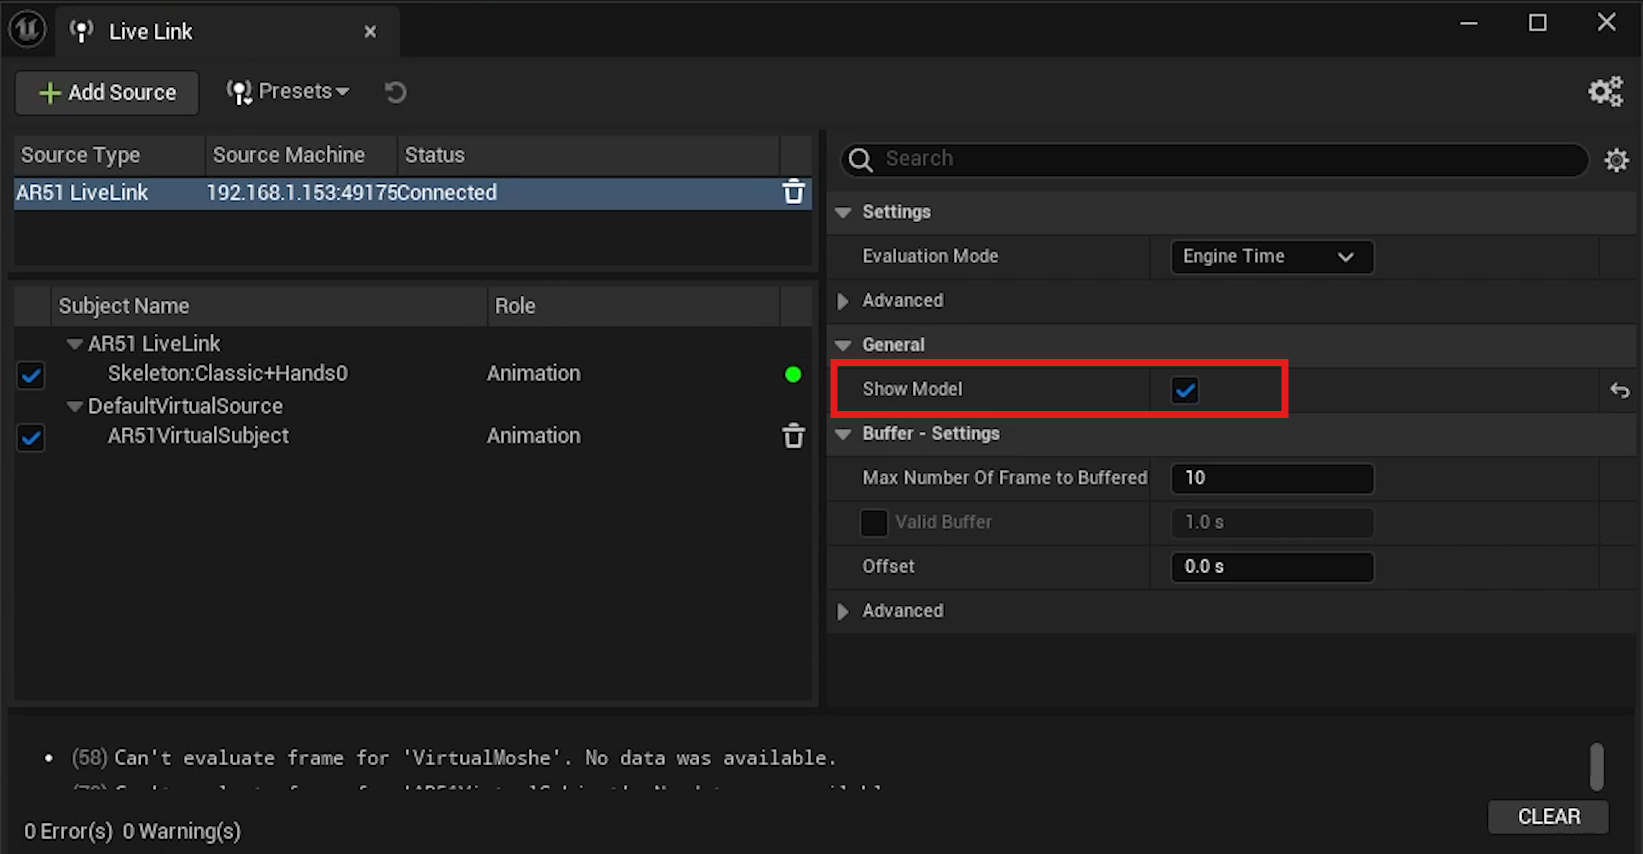
- Open the Live Link panel from Window > Virtual Production > Live Link if it’s minimized.
- Ensure that AR 51 Live Link in the subject name list shows as connected.
- In the right-side attributes panel, ensure Show Model is enabled under General.
Conclusion
You’ve successfully set up Live Link for AR-51 in Unreal Engine. For any issues, revisit the steps and ensure all settings are correct. Thank you for following this guide.