Adding a new Character
The system supports any type of Unreal-compatible Humanoid Character.
Table of contents
- Prerequisites
- Conclusion
This tutorial will guide you through the process of importing an FBX file, creating a blueprint out of the character, editing it, and utilizing the Animation Blueprint in Unreal Engine.
Prerequisites
Make sure the SDK is in the scene (drag the blueprint). And that the unreal project is set up correctly.
Step 1: Import FBX
- Open Unreal Engine.
- In the Content Browser, click on Import.
- Navigate to the location of your FBX file, select it, and click Open.
- In the FBX Import Options window, adjust the settings as needed and click Import.
Step 2: Create a Blueprint out of the Character
- In the Content Browser, find the imported FBX character.
- Right-click on the character and select Create Blueprint.
- Choose a name and save the location for the blueprint, then click Create Blueprint.
Step 3: Edit the Blueprint
- Double-click on the newly created blueprint to open it.
- Edit the blueprint components and settings as needed.
- Save and close the blueprint editor.
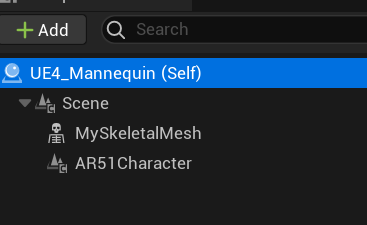
Step 4: Add AR51Character
- Drag the AR51Character class into the blueprint.
- Select the “AR51 Character” in the blueprint editor.
4.a Set the Mesh
- In the Details panel, locate the Mesh property.
- Set it to the same mesh as the FBX character.
4.b Set the NodeNameMapping
- In the Details panel, locate the NodeNameMapping property.
- Set it according to your specific nodenamemapping requirements.
Step 5: Using the Animation Blueprint
If you want to use the Animation Blueprint, follow these steps:
5.a Create an Animation Blueprint
- In the Content Browser, right-click and navigate to Animation > Animation Blueprint.
- Select the parent class and the FBX character that you want to create the animation blueprint for.
- Name and save the new Animation Blueprint.
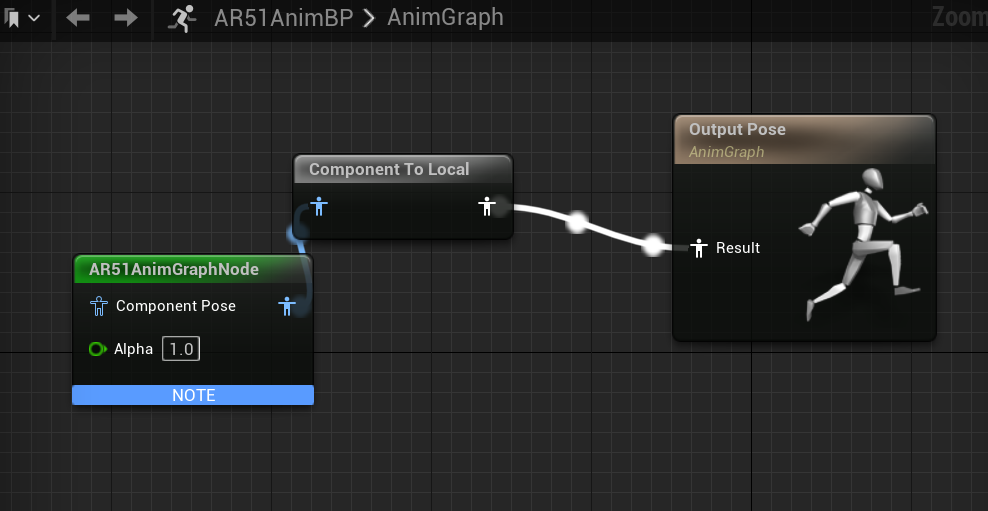
5.b Add AR51AnimGraphNode to the AnimGraph
- Open the newly created Animation Blueprint.
- In the AnimGraph, add the AR51AnimGraphNode.
- Connect the AR51AnimGraphNode to the Final Pose.
5.c Hide AR51Character in the Game
- Select the AR51Character in the viewport or world outliner.
- In the Details panel, change its visibility settings to hide it in the game.

Conclusion
You have now successfully imported an FBX character, created a blueprint, edited it, and set up an Animation Blueprint in Unreal Engine. Feel free to explore more features and functionalities in Unreal Engine to enhance your game development skills.