Configure fs.com Switch
Table of contents
Goal
The goal of the steps below is to configure the switch so it will be able to upload 100G to your server using the SFP28 interface.
Steps Before Using the Switch
Step 1: Connect the Fiber Optic Cable
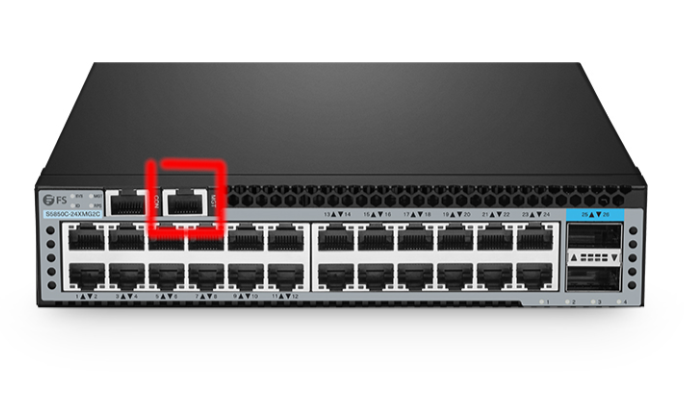
- Connect the fiber optic cable to the server and to port 25 or 26 in your switch.
Step 2: Connect a Laptop for Configuration
- Use an ethernet cable to connect your laptop directly to the switch.
- The switch has a port marked MGT (management). Connect the cable there and to your laptop.
- Once configuration is done, this cable can be disconnected.
Step 3: Set Laptop IP Address
- By default, the switch uses IP 192.168.1.1.
- Set your laptop LAN IP to the same range (e.g., 192.168.1.10).
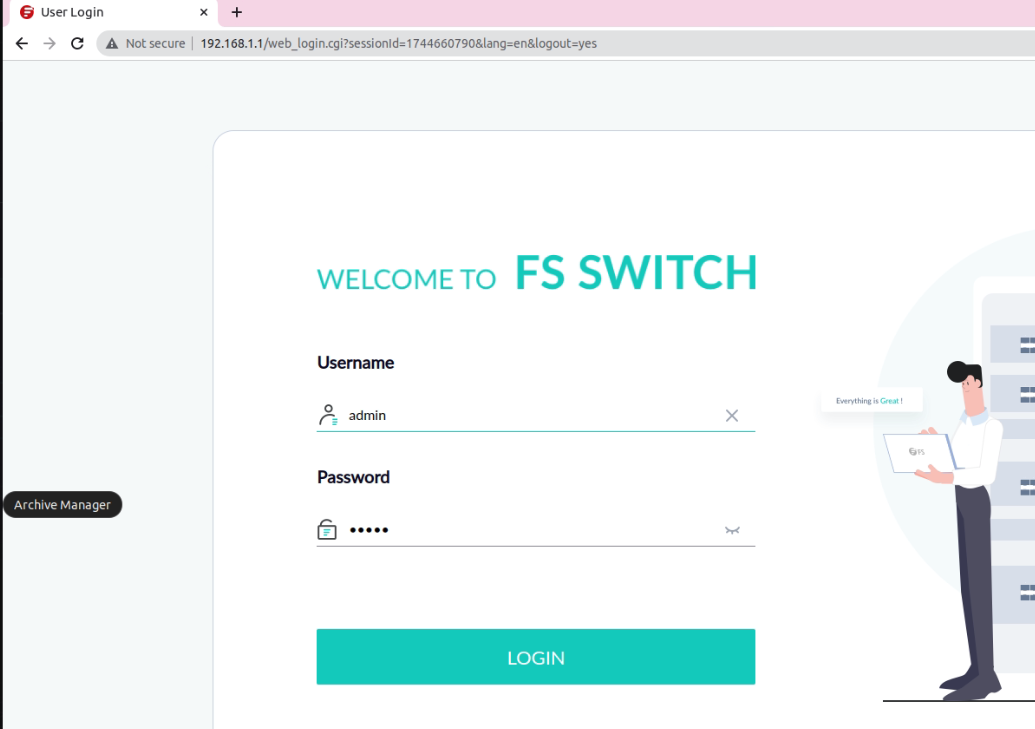
Step 4: Access the Web Management Interface
- Open a browser and navigate to 192.168.1.1.
- You should see the web-based management system of the switch.
Step 5: Login to Web Interface
- Use the following credentials:
- User: admin
- Password: admin
Switch Configuration via Terminal
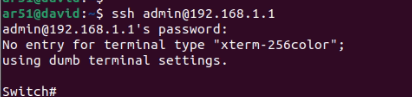
Step 6: Open a Terminal
- On the server: open a terminal.
- On your laptop: open PuTTY (or another SSH client).
- Connect to the switch:
ssh admin@192.168.1.1 - Password: admin
Step 7: Identify the 100G Interfaces
- The switch has two 100G interfaces: port 25 and port 26.
Step 8: Configure Ports via SSH
Run the following commands:
configure terminal

interface eth-0-25
shutdown
no shutdown
speed 100g
duplex full
fec rs
exit

interface eth-0-26
shutdown
no shutdown
speed 100g
duplex full
fec rs
exit

write memory
reload
- Press Enter to confirm the reboot.
Verification
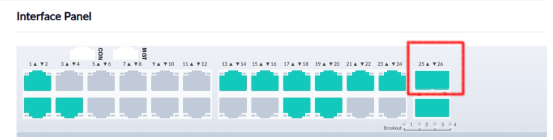
- After reboot, login again to the web interface.
- Ports should show a color change, indicating successful connection.
Summary
By following these steps, you can configure the fs.com switch to support 100G connectivity on your server using the SFP28 interface.